We have packed a lot in our big Summer Update. Maybe it’s too much, but we just couldn’t leave a single feature out. Properly timed for the holiday season, v6.3 brings a wide variety of features for your travel photography and editing on the go.
So make yourself comfortable, as this will take some time…
CURVES TOOL
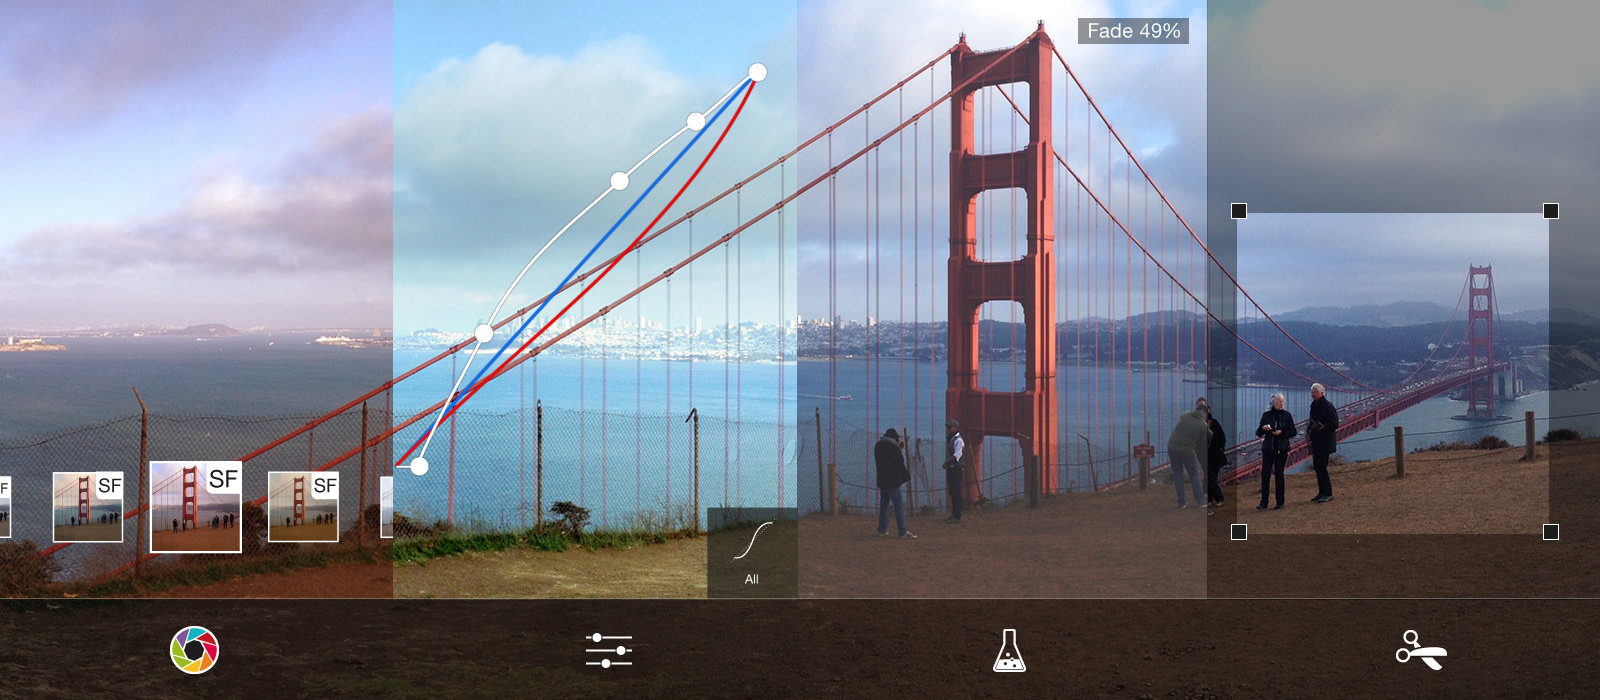
When asking professional photo editors around the world about the one adjustment tool they just can’t live without, most of them will answer “Curves”. With this powerful tool you gain complete control over tonal range. This single tool lets you fine-tune contrast, color, and brightness by adjusting shadows, midtones, and highlights separately.
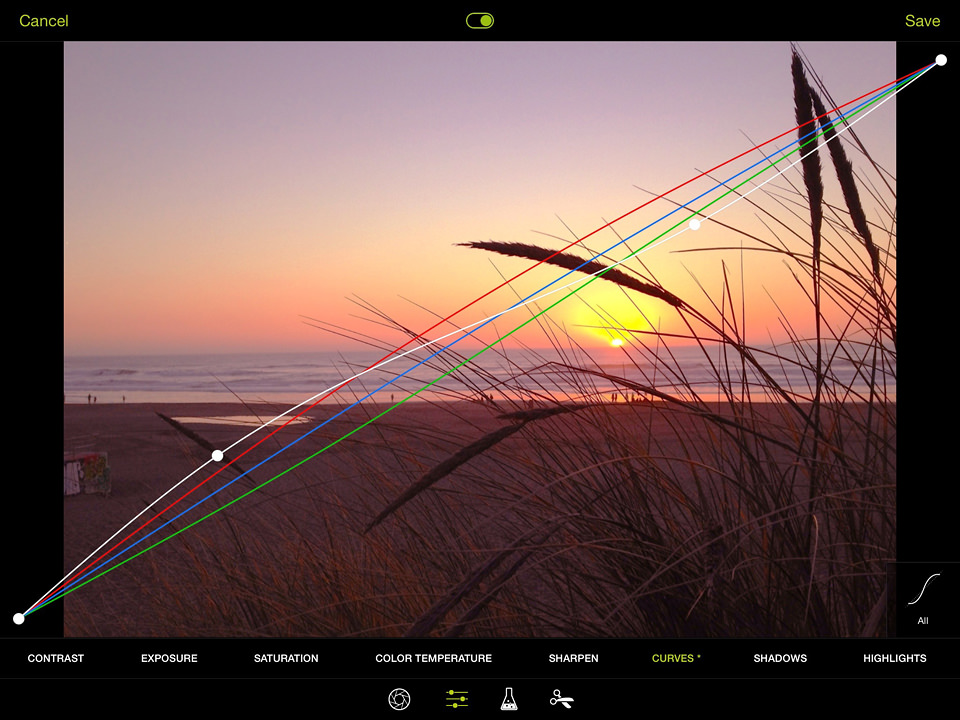
Once you are used to this tool, you will soon appreciate the extensive amount of control it gives you. The concept is simple but effective: The diagonal line represents the original state of your photo, and it’s going from the shadows of your photo (down left) to midtones (middle of the graph) to the highlights (up right). You can tap at one point of the diagonal line and drag it up to lighten — or drag it down to darken this part.
So, for example, if you want to lighten up the shadows in a photo, simply drag a point on the left side of the graph upwards. To darken the highlights, simply drag a point on the right side of the graph downwards.
Expert Mode: Those who mastered the basics of the Curves tool can add a new dimension by adjusting the Red, Green and Blue channel separately. This provides entirely new ways to adjust/correct white balance afterwards, or to create your personal color effect.
SOLAR WIND & MAGNETIC STORM
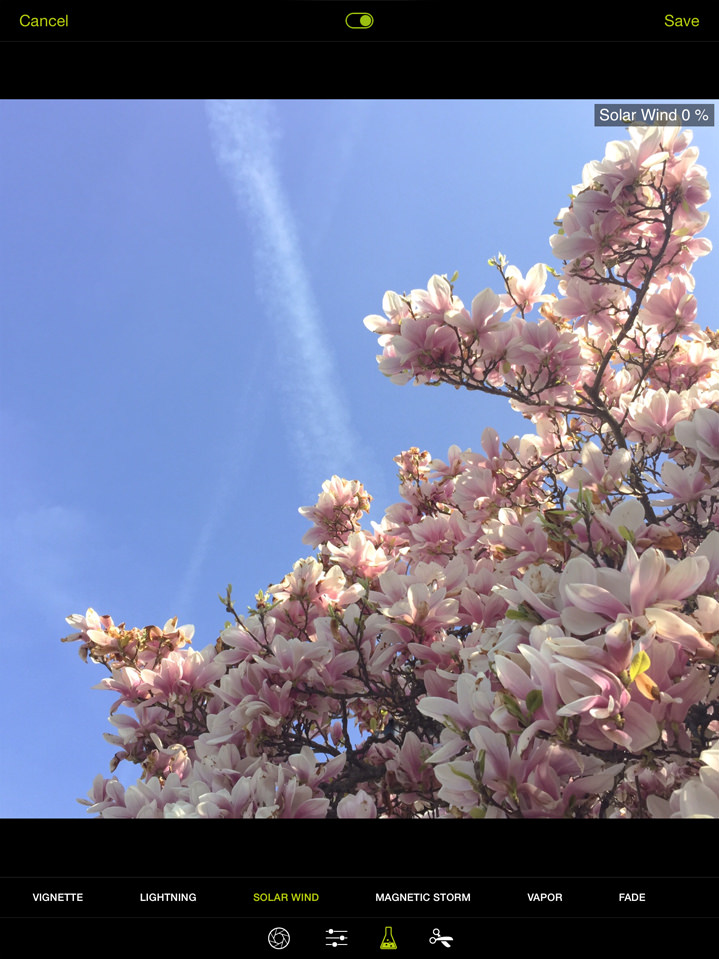
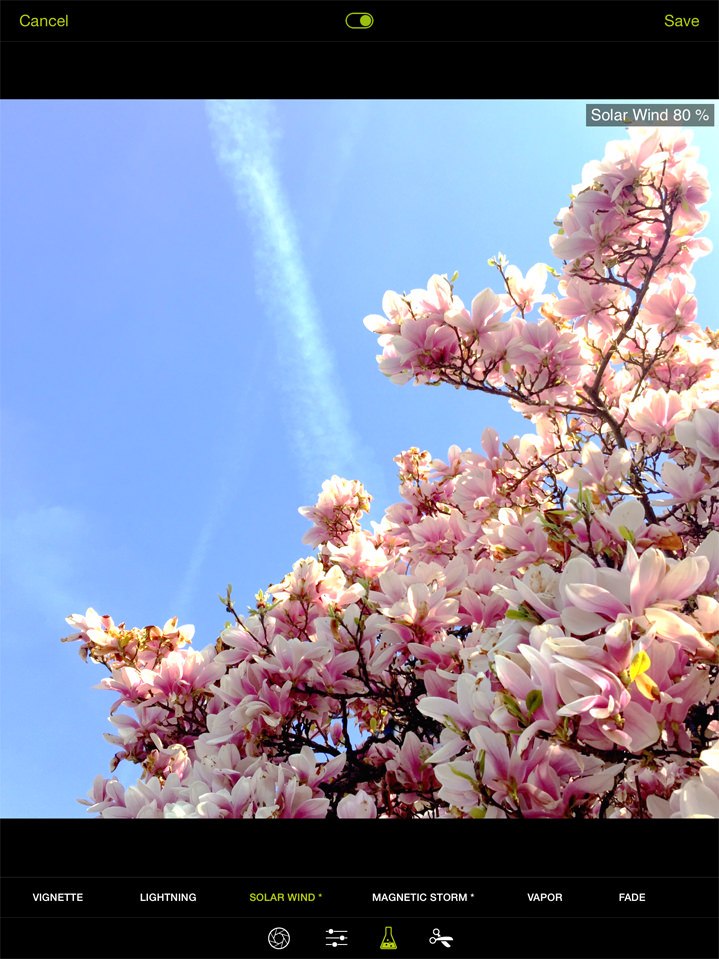
Allow yourself to be surprised: The Magic Tools are an exciting place to experiment. With the new tools “Solar Wind” and “Magnetic Storm” you can produce stunning images with artistic effects and vibrant colors. This is something that we’d rather not explain in detail, to let you explore the possibilities with your own photographs. Create the style you like, with the images you like.
Just two little tips: By swiping up and down, you can dial in positive as well as negative values — and you can also combine the effects of both tools to create something absolutely new.
VAPOR TOOL

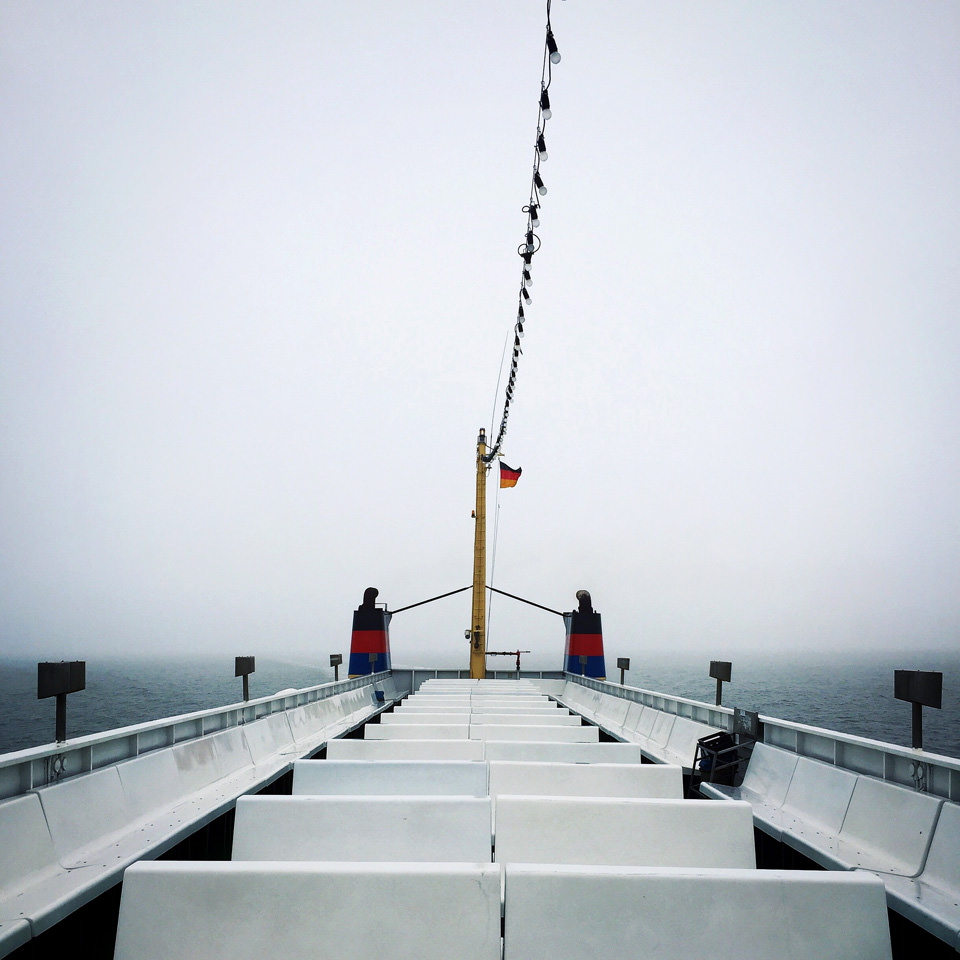
Use it either as a “digital UV Filter” to improve contrast on otherwise hazy shots — or to intentionally add haze to a photo, creating dreamy scenes. Move your finger across the screen to find the right setting: By moving your finger up, you add haze — by moving your finger down, you increase contrast.
I’m sure you all know those hot and hazy summer days. We can’t do anything about high temperatures, but with the vapor tool you can quickly optimize captures from those days. By dialing in negative values, the haze gradually disappears, and your photo gets a lot more “punch”.
When taking the original photo on the ferry boat, it was really foggy. To enhance the contrast in cases like that, you can use the Vapor tool with a negative value.
FADE TOOL

Give your photos a faded, analog look. By swiping upwards, you soften the blacks without blowing out the highlights.
The Fade Tool is a matter of personal taste, but if used on the right photograph, it can really create a tranquil atmosphere.
Tip: Give it a try on one of your black & white photos, too.
PHOTO COMPASS
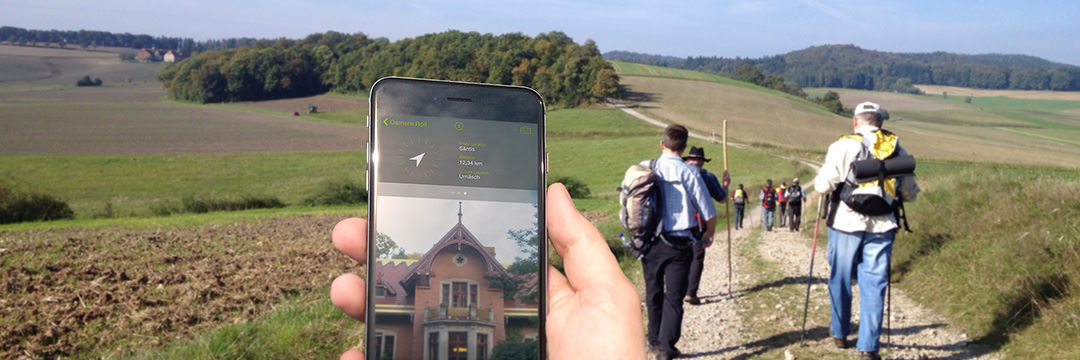
Go back in time! Let the new Photo Compass guide you the way to a photo once taken. Due to the geolocation data included in your iPhone photos, you are now able to find your favorite photo locations again. Rediscover beautiful photographs, and have a look at them from a different perspective.
Recapture the Experience
–
Reexperience the Capture
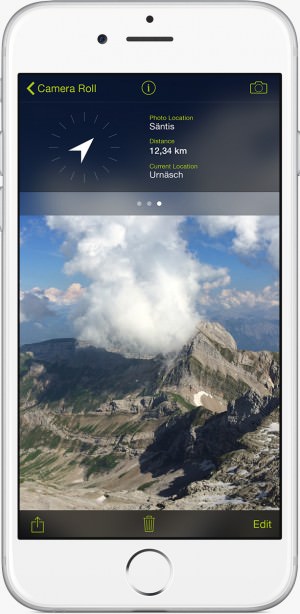
Maybe you know this situation: You took an awesome photo with your iPhone some time ago and really want to find that place again. ProCamera now leads you back there: View that image in ProCamera, tap on the info button (“i”) on the top of the screen. This screen provides you with a lot of information on this particular photo (dimensions, file size, when it was taken, camera settings, etc.).
When you swipe to the left, you enter map mode. That not only shows you where you stood while taking this photo, but in which direction you were facing at that time.
Another swipe to the left and you enter our new and innovative Photo Compass. It tells you where you are right now, where the photo was taken, the distance between those two places as well as the direction to that spot. With a double-tap on this box you enter full-screen mode.
What makes the Photo Compass yet more useful, is that it even works without an internet connection. That comes in extra handy when you’re out in the wild, where you have no network coverage, or abroad, where your mobile contract doesn’t grant you access to mobile internet.
Of course you can use it for something as profane as finding your parked car — but we like to think of it as something that leads you back to beautiful places and precious memories.
IMPROVED HDR CAPTURE
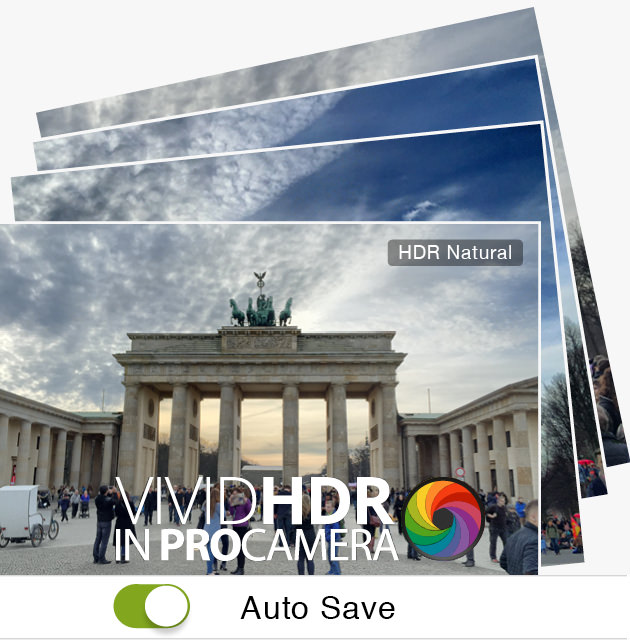
The renowned vividHDR technology got even better: The already short processing time has been further reduced, and we furthermore introduced an auto-save option.
Under Settings > HDR Settings you can activate the auto-save option for HDR captures, which omits the preview of your HDR capture where you swipe through the different HDR presets. Auto-save is beneficial when you want to take a series of HDR photos without being interrupted.
As you skip the screen, where you would normally choose the preset for HDR processing (natural, vivid, dramatic, black and white, faded), this can now be set in the Control Panel: When in HDR mode, open the Control Panel (icon with the three lines, bottom right) and select the preferred preset in the top left of the menu.
The use of the auto-save option depends on the situation:
If you want to see a preview of the different HDR presets before you save your shot, deactivate HDR auto-save.
If you know you want to take a series of HDR photos as quickly as possible or you know which HDR preset you like to use for these photos, HDR auto-save is the right setting for you.
ENHANCED APPLE WATCH SUPPORT
After having successfully integrated the Apple Watch into the ProCamera line of products, we’re expanding the remote controls in this update.
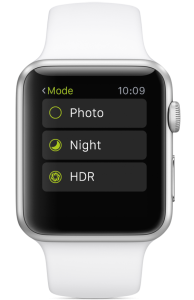
Now you are able to remotely capture photos in HDR and Night-Camera mode, too.
Via Force Touch you can switch between the 3 camera modes (Photo, HDR, Night) directly at your wrist.
NEW MASONRY THUMBNAIL VIEW
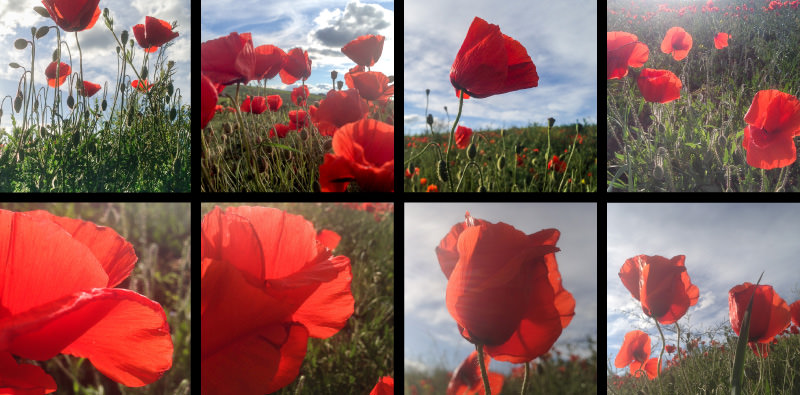
The old layout with square thumbnails: Non-square photos are cropped, the miniature doesn’t show the full image.
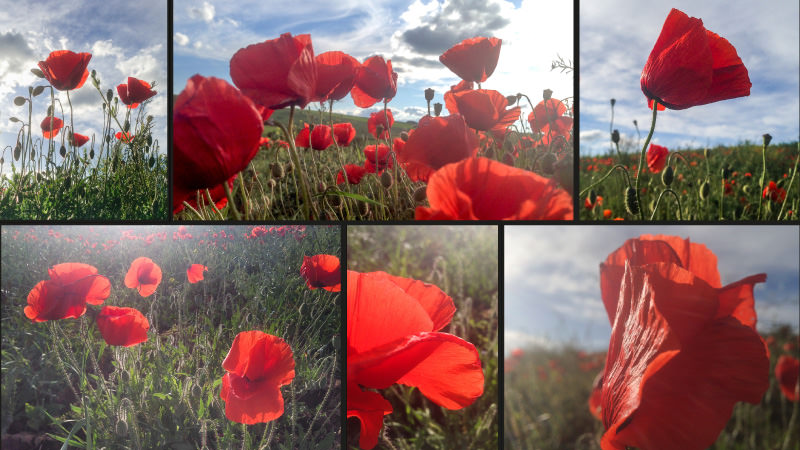
The new layout with a fluid masonry design: All miniatures show the full aspect ratio of each image.
The previews in your Camera Roll and Lightbox are now shown in their native aspect ratio. This means thumbnails are no longer displayed as a line-up of uniform squares, and therefore you can easily keep apart images in photo series.
The downside of previews in square format is the effect it has on all non-square images — all of these are cropped and never show the full image. With the new masonry layout you always see the full image, and you are able to immediately tell whether it’s a photo you took in landscape or portrait mode, or a photo of a specific capture format or cropping.
TODAY WIDGET QUICK LAUNCH
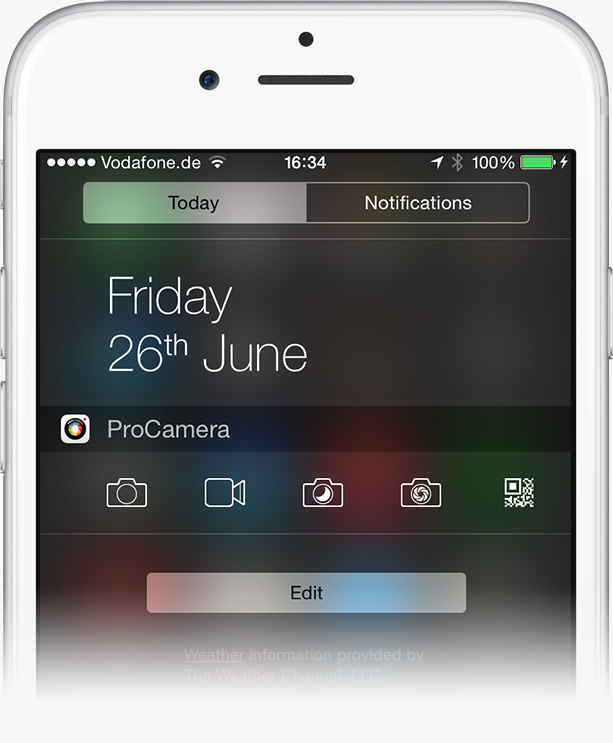
We all know how important it is not to miss that “decisive moment” when photographing. Therefore we have incorporated a quick launch widget, so that you are ready to shoot in no time. The Notification Center is your iPhone’s customizable repository for system and app notifications. To open it simply place your finger above the top of your screen and pull down — even when your lock screen is displayed.
How to add ProCamera as a Today View Widget:
The today view can be customized via the Edit-button at the bottom (only visible when your iPhone is unlocked). After you have updated to ProCamera v6.3, the app will be listed in the Edit-menu. By tapping the little green + icon in front of the app name, you add the associated widget to your Today Screen.
How to use the ProCamera Widget:
The widget enables you to rapidly launch ProCamera, namely in one of the 5 camera modes. So if you plan to record a video for example, directly launch the app in Video mode.
To best meet your requirements, the order of the Camera modes in the widget is the same as in the Camera Mode Selector of ProCamera. If you re-arrange the Camera Modes in the app, those changes will be taken over in the Widget.
OPTIMIZED AUTO-FOCUS SYSTEM
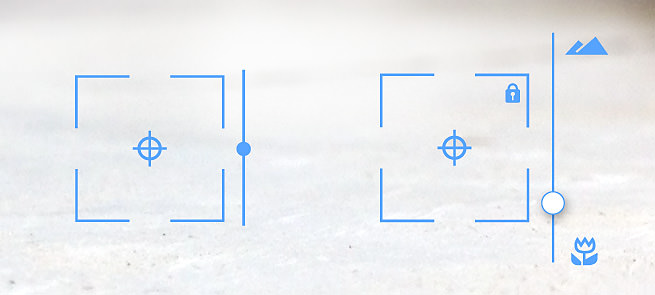
We have optimized the Auto-Focus system to make it faster and even more precise. Give it a try and see how fast you get a tack sharp image.
As this is a new development, we are very interested in your feedback.
To learn more about the plethora of features in ProCamera 8, download the desktop version of our Manual:
https://www.procamera-app.com/en/user-manual/
As with all new iOS releases and updates, if you have any suggestions or find a bug then please let us know via the in-app support or email us at support@procamera-app.com.
If you’d like to support our development please help spread the word. Consider leaving a review in the App Store:
review.procamera-app.com — Every single review is much appreciated.


Hi,
it’s great update! Thank you so much.
By the way, would you please let me know how I can open Pro Camera from Lock Screen? I can open from notification center after unlock but can’t on lock screen.
“To open it simply place your finger above the top of your screen and pull down — even when your lock screen is displayed.”
Thank!
Hello Ken,
glad you like the new features in v6.3.
This is how you launch ProCamera from your Lock Screen: Press the home button so that you see the Lock Screen (time, date and “slide to unlock” is displayed) > When this screen is displayed, pull down the Notification Center from the top of your screen > If the ProCamera widget was added to the Notification Center, it will be displayed on the Today-Screen (on the top of the Center you switch between Notification and Today Screen). With a tap on one of the Camera Mode Icons you launch ProCamera.
Did that clarify your question?
Enjoy v6.3 and all the new features
Why can’t I switch rear/front lens for HDR imaging?
Hi Ceecee, at the moment we only offer support for the rear camera in HDR mode, as this is the better camera.
Since the update, the app has crashed every time I try to open a picture from my camera roll to edit. It’s been sending reports when I reopen the app, but I haven’t seen any update yet. Please fix asap. I didn’t want to leave a bad review when the app, itself, takes such great photos. I have the latest iOS version and am on an iPhone 5s, if that helps.
Hello Emily, thanks for your feedback and patience. This crash is related to issues with Apple’s Photo Cloud. We are working intensively on it, to fix it as soon as possible.
Good news about that crash caused by an issue with the Photo Cloud. The developers have been really busy preparing an update to fix it. If somebody wants to get their hands on this beta-version, before the update hits the App Store, they can contact us at: support@procamera-app.com.
Enjoy ProCamera
Does anyone know how to get the Bluetooth shutter to snap a photo instead of activating the column control?
Hello Richard, please make sure you have Volume Trigger turned on by opening the Control Panel > Settings > Volume Buttons > On.
In the same way, on principle, ProCamera can trigger the shutter via bluetooth if your third party bluetooth remote shutter simulates (emulates) a headset.
If you find that it works with your device, please let us have the exact name or maybe a link, so we can take note.
That would be much appreciated, thank you.
This selfie stick works fine with ProCamera with a method describe above(opening the Control Panel > Settings > Volume Buttons > On.):
https://www.amazon.com/gp/product/B013B1ABGC/ref=oh_aui_detailpage_o02_s00?ie=UTF8&psc=1
Thanks,
Grayr
I like your procamera and must be require any topic just i appreciate in your blog.