We’re kicking off a new set of short ProCamera tutorials to guide you through a few of the app’s tools and features.
As iPhone photographers, we all share our photos online. But, one of the challenges of putting your photos on the web is retaining ownership and copyright over your photographs.
One simple way you can help secure your photos is to add your name and details to the EXIF data that is embedded in your picture – almost like a virtual watermark. ProCamera is one of a few camera replacement apps that allows you to do this, here’s how:
First tap the PRO button on the Capture Screen and select Settings.
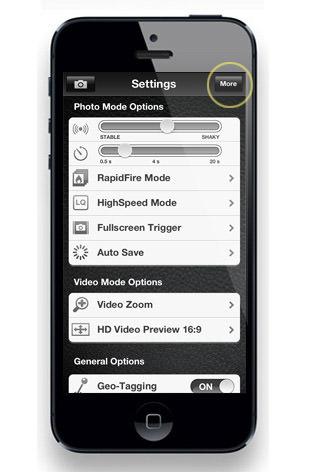
This brings up the Settings list. Click on More in the top-right corner to expand out the full list.
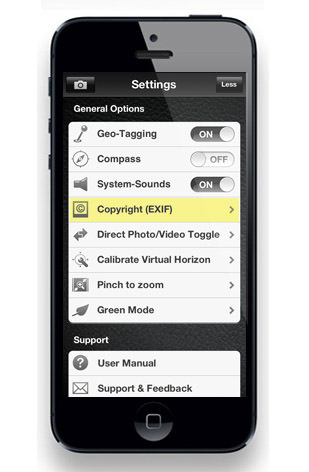
Scroll down and look for Copyright (EXIF) under the General Options subcategory.
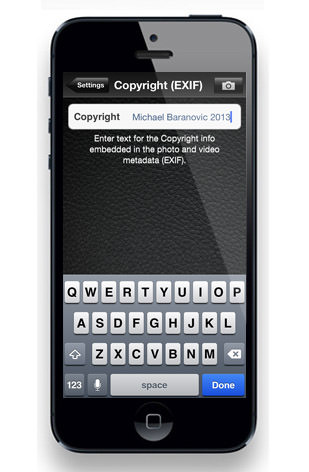
Now you can enter your name and any other information you want embedded in the photo. Press Done when you’re finished.
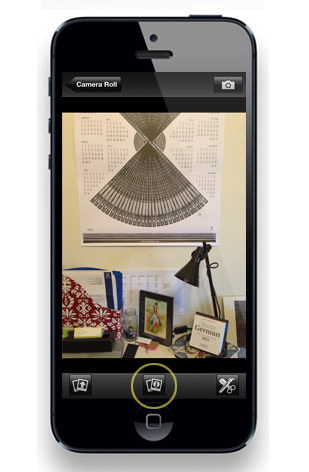
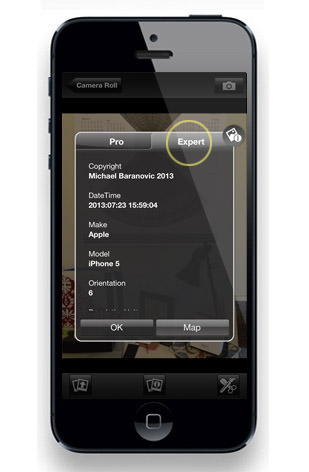
You can check the check your EXIF data by clicking on the Info button in the single image Lightbox/Camera Roll view (middle bottom).
Clicking on the Expert Tab at the top-right lists the full EXIF info, your new details can be found under the Copyright heading towards the end of the menu. You can also read your EXIF data in third party program’s like Adobe Photoshop.
If you’d like more information on copyrighting your photos then I recommend checking out this article on the Connect site. If you have any questions about this tutorial then please leave a comment below or email me at misho.baranovic@cocologics.com.
……………………………………………………………………………………………………………………………….
ProCamera is available on the App Store for US $4.99, £2.99, ¥ 450



Meaningful learning tutorial..
Hi, please update the tutorials to reflect the updated UI of the latest version; had some problems following along due to the differences. Thanks.
Hello Homer, here you can download the new user manual: https://www.procamera-app.com/en/user-manual