
Welcome to the first of the new series of ProCamera tutorials. This first introductory tutorial will show you how to use the Camera mode on ProCamera to take great photographs on your iPhone.
We encourage you to read through the tutorial while you have the ProCamera open on your phone, that way you can play and experiment with the different features as you go along.
1. Basic Mode
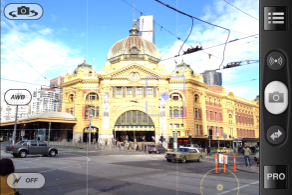
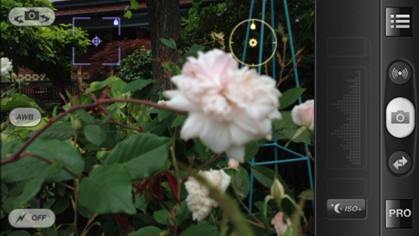
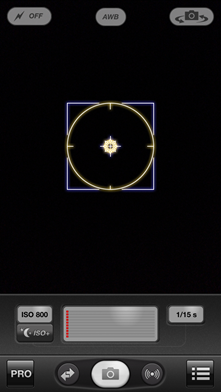
When you first launch ProCamera you are presented with the basic Capture Screen. Similar to the iPhone Camera app, ProCamera automatically adjusts focus and exposure of the scene – as indicated by the large circle/square combination in the centre of the screen (see screencap below).
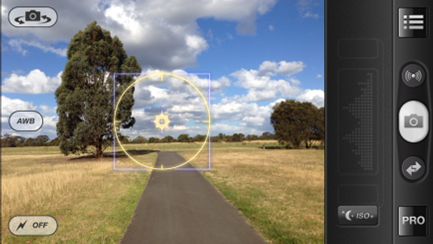
Pressing anywhere on the Capture Screen lets you set the combined focus and exposure for that part of the scene. This gives you increased control over the shooting process. Here are two examples which show how this feature works.
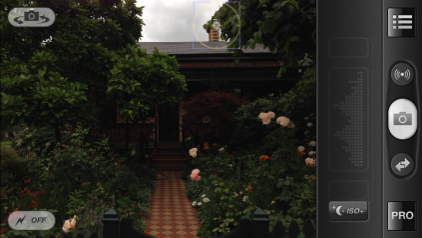
The image on the top is exposed for the sky, making the image too dark. In the image on the bottom, I’ve touched on the garden in the foreground, correcting the exposure and retaining highlight detail.
2. Expert Mode
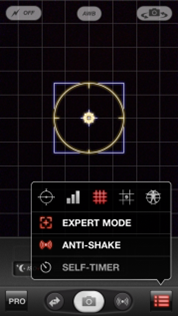
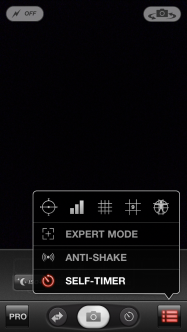
Expert mode is found under the Options Button in the bottom menu.
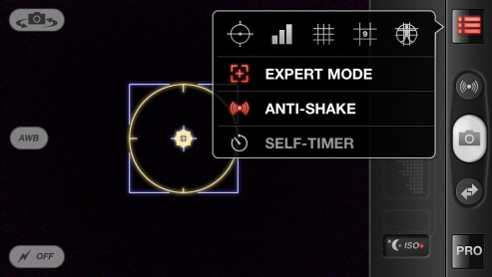
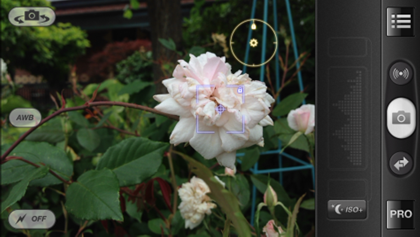
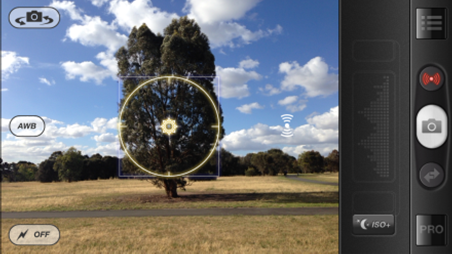
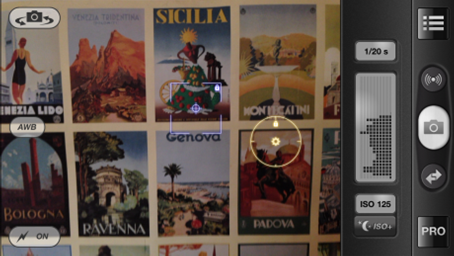
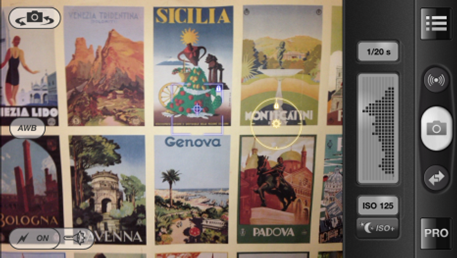
It is one of the most important functions for achieving advanced shooting, giving full manual control of focus and exposure. The exposure and focus touch controls can be moved around the screen to selectively and independently adjust exposure and focus. As shown below, the yellow circle controls the exposure, the blue square controls focus.
2.1 Exposure Control
| Exposure 1 | Exposure 2 |
 |
 |
| Exposure 3 | Exposure 4 |
 |
 |
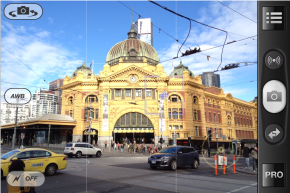
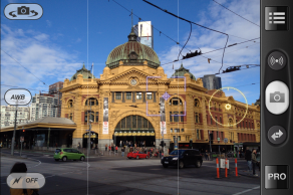
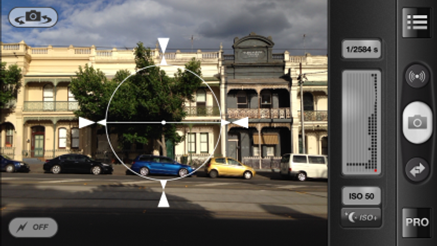
The photo exposure changes as the yellow circle moves up the scene, from overexposed (Exposure A) to underexposed (Exposure D). The most balanced exposure, with both street and sky detail, is Exposure C. Images taken with an iPhone 4S.
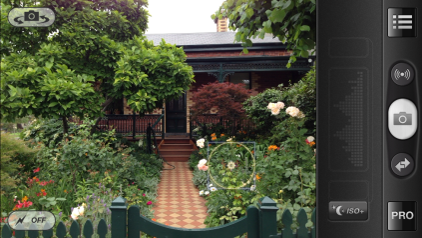
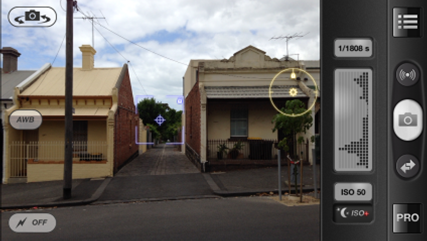
2.2 Focus Control
Focus 1
Focus 2
You can see how moving the blue focus square changes the focal point from the flower in the first example to the house in the second. You can use this feature to achieve good subject separation on close-up images.
2.3 Grid Lines
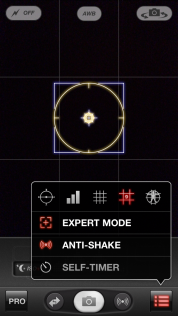
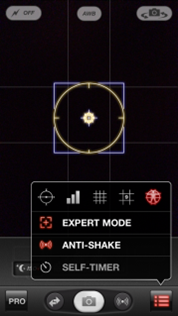
There are three sets of gridlines (small, rule of thirds and golden mean) available under the Options Menu to help with the composition of the photograph. We encourage you to use all grid types to determine which one suits your shooting style.
|
Fine Grid
|
Rule of Thirds Grid
|
Golden Mean Grid
|
2.4 Spirit Level
The Spirit Level is the first function in the top panel of the Options Menu. The Spirit Level helps you to keep your photo straight, horizontally and vertically.
Here you can see how the Spirit Level works to align your photograph:
Before

After
2.5 Histogram
The Histogram is the second function in the top panel of the Options Menu. An image histogram graphs the light levels in a photo. Black (shadow areas) are on the left, white (highlights) are on the right. The height of each column shows the number of pixels at each step between black and white.
The ProCamera Histogram has an in-built warning system telling you if a section of the image is over or under exposed. Here is the same image exposed in three different ways, resulting in three different histograms.
Histogram Example 1 (Overexposure)

For this first example I have placed the exposure circle in the shadow area in the bottom of the image. The red warning bar at the top is telling us that we are losing highlight detail on the building and sky, indicating that we need to drop the exposure a little.
Histogram Example 2 (Underexposure)

In this example I’ve exposed for the sky, this time nearly all the histogram data is on the bottom – telling me that that most of the photo is dark (which it is). The red warning bar is also telling me that the image is underexposed. The photo needs to be brightened.
Histogram Example 3 (Balanced Exposure)
In this final example I’ve placed the exposure circle on the house, the histogram is telling us that there is detail in the shadows, midtones and highlights without any data being lost. You can clearly see that that the exposure is far more balanced than the other two.
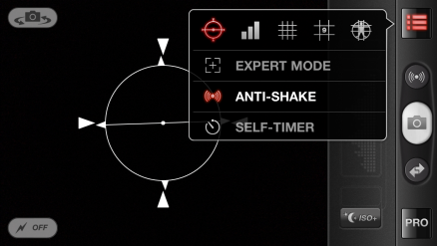
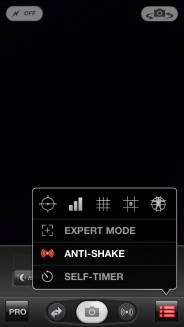
2.6 Anti-Shake and Self-Timer
You can set the second button on the image capture screen (to the right of the shutter button) to either an Anti-shake or Self-timer button as highlighted by the yellow circle below.
|
Anti-Shake Activated |
Self-Timer Activated |
Anti-Shake and Self-Timer Sliders |
 |
 |
 |
The Anti-Shake feature will delay the shutter release until ProCamera is steady, helping you take clearer, sharper pictures. Movement detection is shown onscreen by a small icon on the right hand side of the image (as shown below). You can also set the degree of sensitivity from ‘Stable’ to ‘Shaky’ using the top slider in the Settings Menu. The default sensitivity settings are a good balance between speed and stability.
Through the Settings you can adjust the Self-Timer length from 0.5 to 20 seconds. The Self-Timer is great for group and self-portraits or to reduce camera shake resulting from touching the screen.
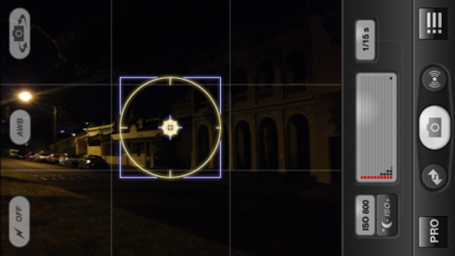
2.7 ISO Boost (iPhone 5 Only)
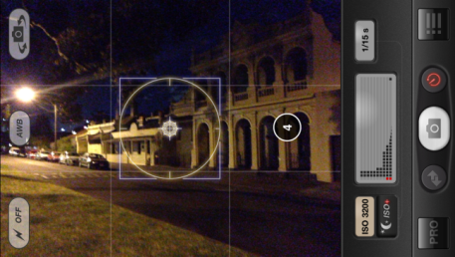
The ISO Boost is a new feature added for the iPhone 5. The ISO Boost button is located above the PRO Button and activates once light levels are very low, increasing the iPhone sensitivity from 800 to 3200 ISO. Here you can see two examples with and without ISO Boost.
Here you can see the first shot, as you can see on the screen with ISO boost turned off the iPhone is struggling to pick up enough light at ISO 800.
Here is the same image with ISO Boost turned on, bringing in much more light into the scene. ProCamera shows you when ISO Boost is on by highlighting the ISO readings in yellow. You can also see that the Self-Timer button is highlighted in red and the countdown is displaying the number of seconds left before the photo is taken.
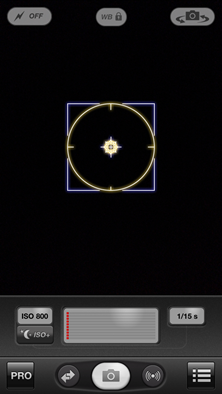
2.8 White Balance Lock
Turning on Expert Mode brings up the White Balance button on the capture screen (top-middle). Using this tool, you can set your own white balance when shooting. This is great when there is indoor or mixed lighting and the auto white balance is not reading the light correctly.
| Auto WB | WB Locked |
 |
 |
One way to manually set white balance is the “white paper” method. With White Balance on Auto (AWB), aim your camera at a bright white sheet of paper (or white wall), then press the White Balance button to lock.
2.9 Digital Zoom
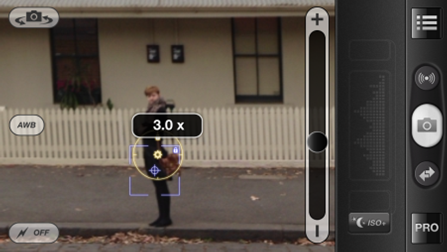
ProCamera is equipped with a 6x full resolution zoom. You can activate the zoom by pinching the screen with two fingers. The magnification level is displayed on screen. When using higher zoom levels (3.0X and above) it is recommended that ProCameraʼs Anti-Shake mode is also used.
Here you can see the same scene at the standard and 3x magnification.
Standard

3x Zoom
2.10 Steady Light
As well as a standard flash which can be toggled on and off, ProCamera also includes a Steady Light function which provides continuous illumination for dim and dark scenes. While using the Steady Light you can also adjust the exposure levels – giving you extra control when shooting at night.
You can see the difference with and without the Steady Light in the two examples below. You can see the Steady Light symbol shown in the lower-left corner of the bottom example.
Without the Steady Light
With the Steady Light
2.11 Summary
We hope you enjoyed the first of our new ProCamera tutorials. If you have any questions about any of the ProCamera functions then feel free to email me at misho.baranovic@cocologics.com.
The next tutorial will focus on the advanced shooting settings including RapidFire, High Speed, FullScreen Trigger and technical aspects including JPEG compression, datestamp and EXIF information.
Keep up to date with tutorials, news and features by signing up to our
Newsletter.
—
ProCamera 3.8 for iPhone is available on the App Store for $2.99


Proofread exposure control section!
Thanks Steven.
At the end of the section on the Basic Mode, where it says “The image on the top is exposed for the sky, making the image too bright.” – shouldn’t it be ‘making the image too dark’ ?
Thanks @Quillc:disqus, we’ve fixed it.
Very useful tutorial, I wait next one already.
Thanks @95146f80bf95b96ec601ad6c6ca8b0fe:disqus – we’re really glad you found it useful.
Can you make the tutorial printable?
Hi Nancy, it’s something we will take into consideration as we’re preparing the next tutorial. Thanks for the suggestion 🙂
Well, that is a nice tutorial. Thank you. But the setting the whitebalance could need a more indepth explanation (pictures maybe). It is kind of hard to get a good balance when the auto reads it incorrectly already. There is no way to point the iphone in a direction that gives a different/correct setting even using a paper.
Glad you enjoyed the tutorial. Thanks for the suggestion regarding the white paper tutorial. We agree that a more indepth explanation would be more helpful re white balance settings. We’ll get started on one.