We are very happy to welcome Nicki Fitz-Gerald as a guest author on our blog. Being the founder of iPhoneographyCentral.com she is an avid mobile photographer – and today she shares her personal view and outlines the importance of independent focusing.
ProCamera app has been my choice of camera app pretty much from the beginning of my iPhone photography passion which started back in 2009. Back then the Apple Camera only had point and shoot and if you’re coming from a DLSR background, like I am, you probably want to have a lot more control over creating your shot. ProCamera not only has great advanced features but they are very easy to use.
Lock focus and exposure
Without doubt – and probably the main reason why I started using ProCamera – was the ability to independently select focus and exposure. Being able to control focus and exposure independently allows you to really control the look of your photo. Controlling the focus gives you ultimate control over which part of the image you’d like to be sharp and controlling the exposure greatly expands the creative possibilites over your photos. For example locking your exposure on the light background with a figure in the foreground can result in great silhouette shots.
In this article I have concentrated on the independent focus feature which ProCamera have recently expanded to include the brilliant Manual Focus option. This feature, which I use 99 per cent of the time to take my photographs, gives you fantastic control over which parts of an image you want sharp and in focus (usually your main subject) and the part you’d like out of focus (or slightly blurred). This is typically known as creating a shallow depth of field in traditional photography – with a smartphone you can best achieve this by getting really close to your subject.
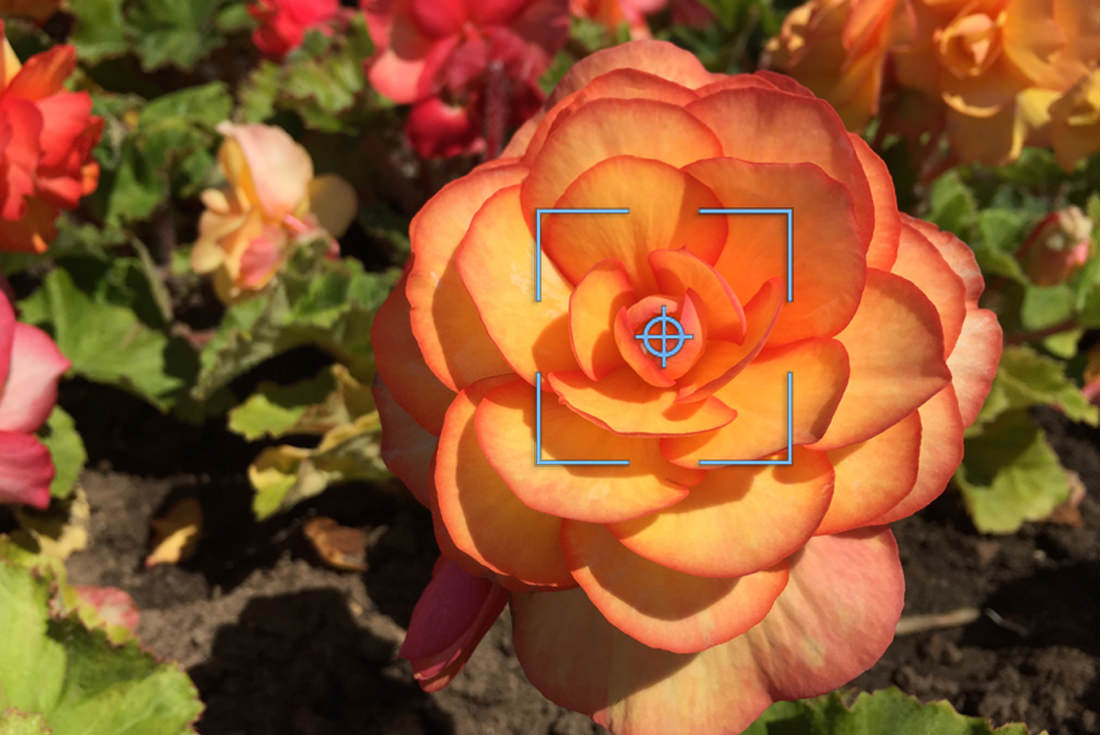
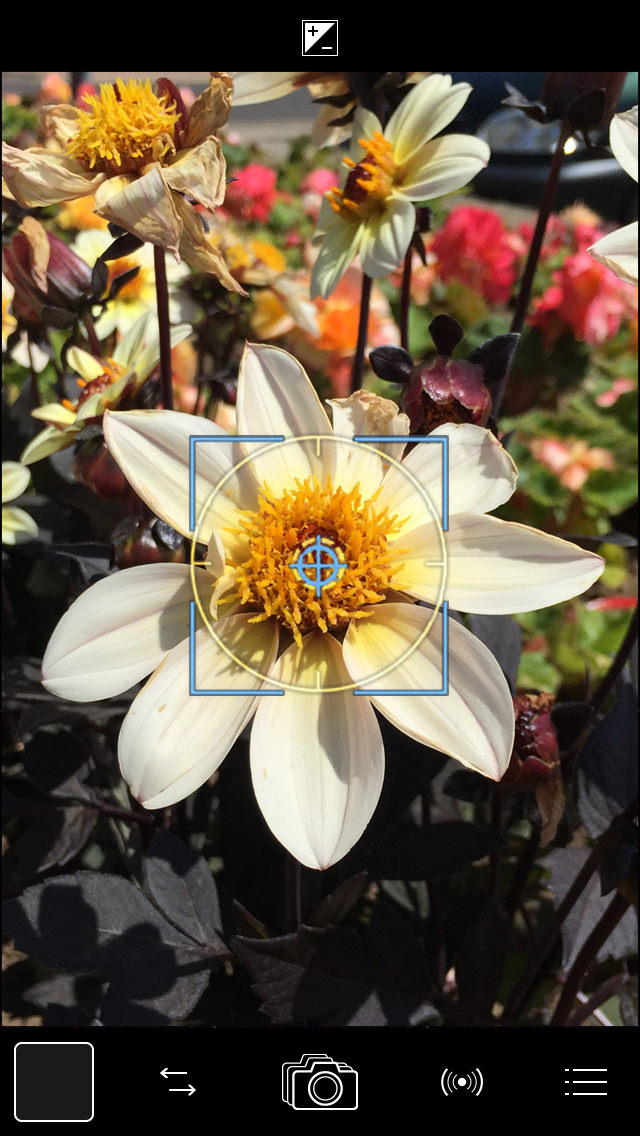
Above shows the blue focus reticle. Tap and drag the reticle around the part of the image you would like to be the sharpest part of your image.
So how does the independent focus and exposure feature work in ProCamera?
When you first open ProCamera, by default the autofocus and exposure are activated. This means that the lens will automatically focus and expose for whatever is in the central area of the screen making the subject in this area sharper.
The focus tool is a great feature for creating a “shallow depth of field look” where the main subject is sharp and the background is blurred. The focus and exposure reticles automatically appear together (pictured above, right) but they can be separated to give you even more control over the look of your image.
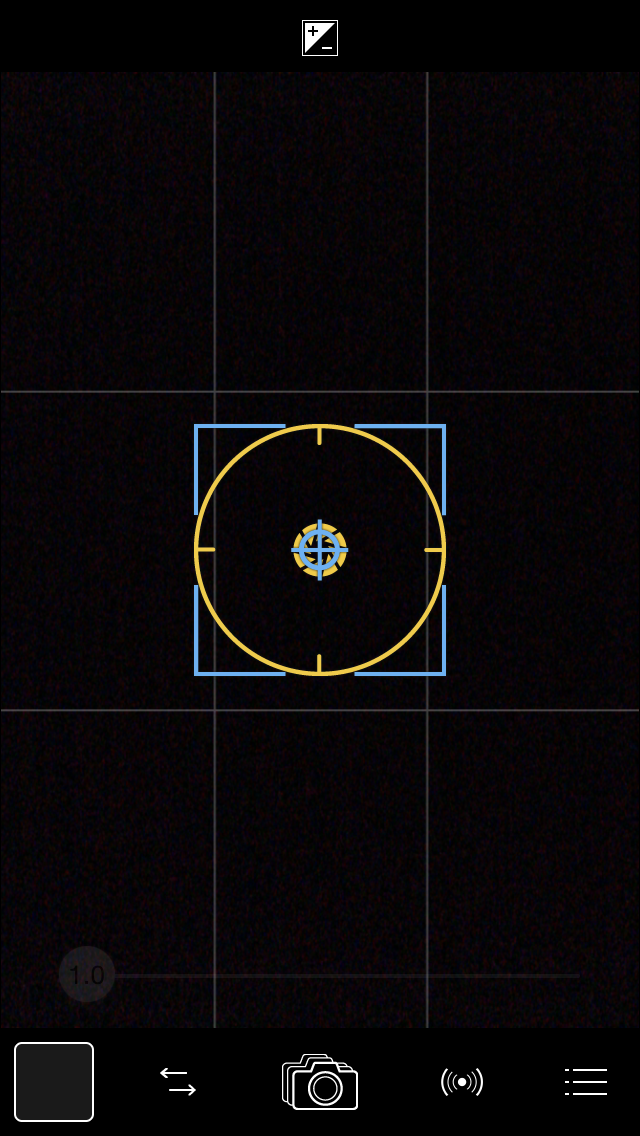
You’ll notice when you first open the app; a linear blue square and a yellow circle appears. (above, right)
The blue square is the focus reticle, so wherever the blue square is on the screen will be the sharpest area of your image. The yellow circle represents the exposure reticle and wherever the yellow circle is on the screen, this will be the point where the exposure reading is taken from. So, you can just point your camera in autofocus mode at something like this flower below and you’re going to get the flower beautifully sharp and nicely exposed. Also, notice that the background is blurred creating that nice shallow depth of field look which draws attention to your main subject, the flower.

Selective focus.
Now this is great if your subject is in the centre but what if your subject is slightly off centre like the yellow flowers in this image below? You’ll need to tell the camera where to focus and this is where ProCamera’s advanced features – the independent focus and exposure really come into play. As clever as the iPhone camera is, it doesn’t always know what part of the image you want to focus on.
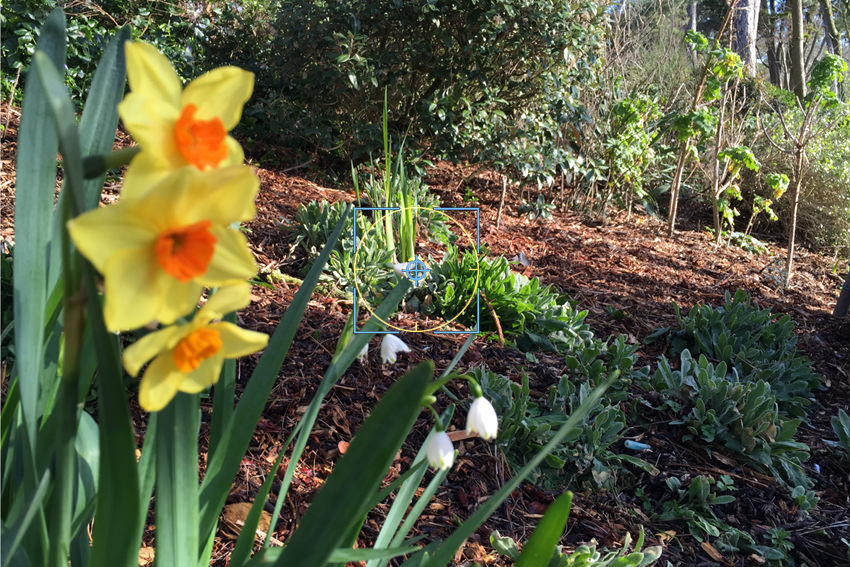
In this scene above I want the flowers in the foreground on the left to be the sharpest part of the image but the autofocus isn’t sure what I want to focus on and it automatically focuses on the middle of the frame – the scene behind – making my main subject, the flowers in the foreground, blurred.
Control which part the image you want in focus using the focus reticle.
To force the focus on the flowers, we need to separate the focus and exposure reticles. By tapping, holding and gently sliding on the reticles on the screen you will see that the blue focus square and the yellow exposure circle separate.
Set your focus
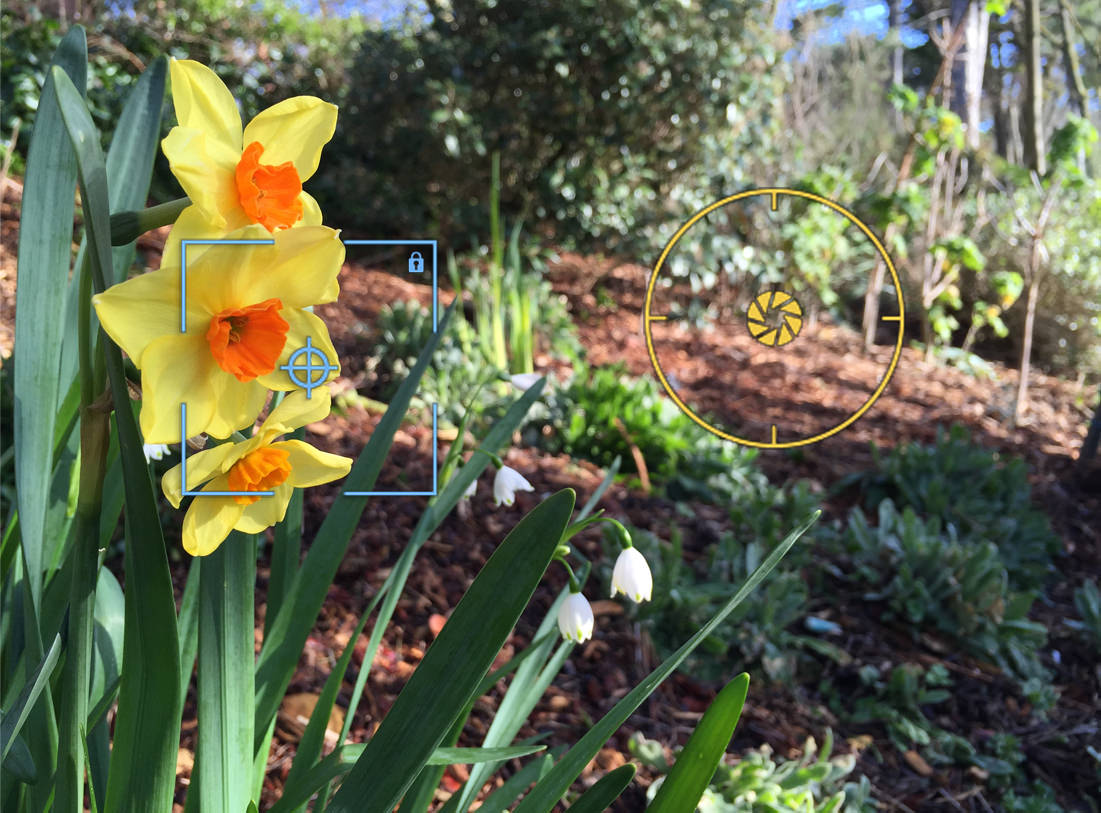
I have positioned and locked the focus reticle on the yellow flowers so that they become the sharpest part of the image. Notice how the background is now out of focus.
You can now slide the focus reticle on to the main subject, in this case the foreground flowers on the left and they will instantly become sharp. Moving the reticle over a high contrast edge with a lot of contrast will help the reticle to focus. Once you’re happy that you’ve got your image nice and sharp, long press the reticle for to lock the focus. You’ll notice a little padlock symbol appear in the top-right hand corner indicating the focus is now locked. This will ensure your image stays in focus.
Manual Focus
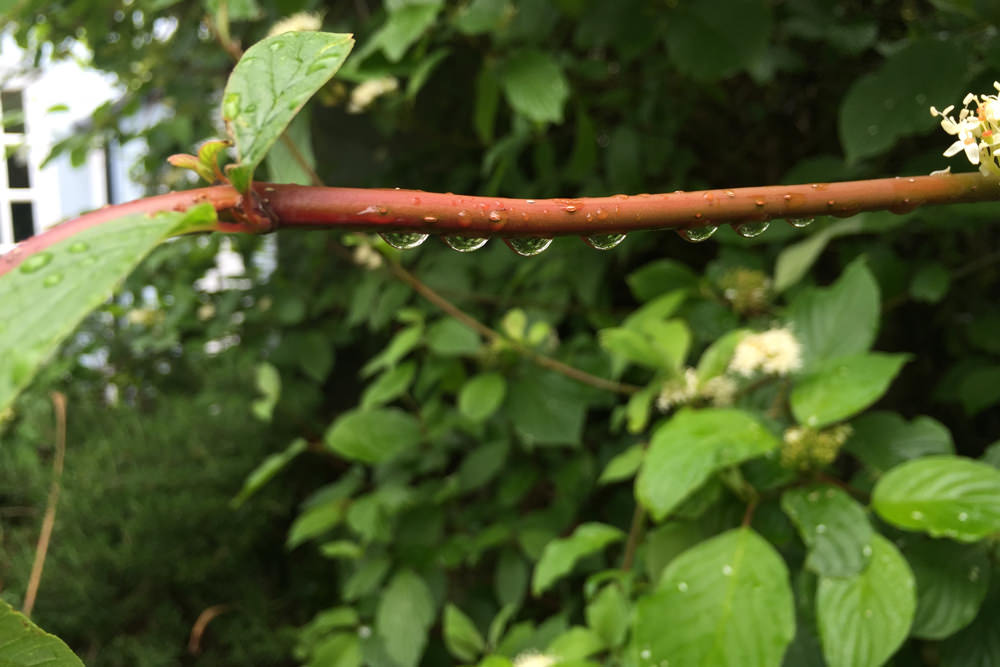
If you’re having trouble focusing on a subject, perhaps the subject is moving or your subject doesn’t have enough contrast or is very small like water drops the manual focus feature is especially useful.
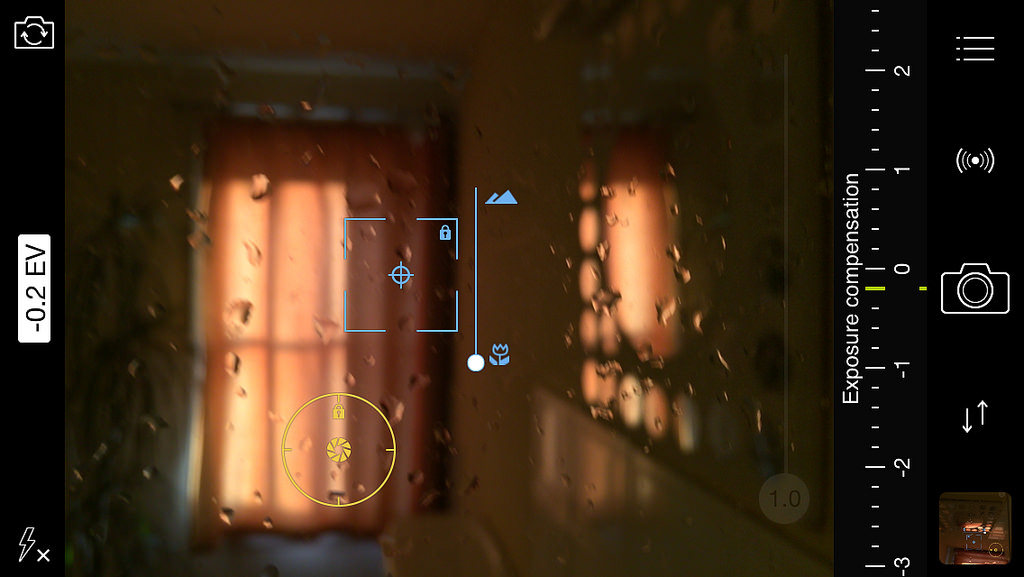

The manual focus feature is excellent for photographing tiny water droplets. Watch the very short video below demonstrating the manual focus reticle.
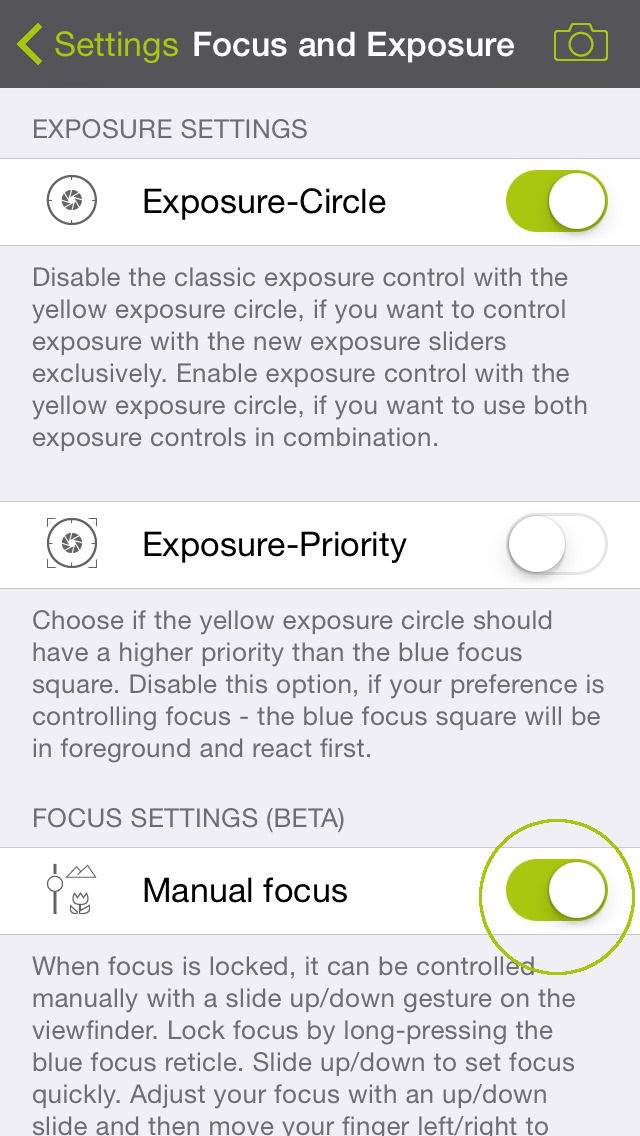
By default Manual focus is switched off. To turn on simply go to Settings>Focus and Exposure> Turn on “Manual Focus”.
Manual focus is also great for creating images like the one below where you want to get the raindrops on the window in focus and the background blurred. To manually focus, simply lock focus and slide up an down to adjust the focusing distance (+ optionally slide left/right afterwards for finer adjustments). Don’t be limited by drops on the window. In the images below, I photographed the drops from the inside of a shower.

Some of my favourite photographs
I live just a few minutes walk away from Weymouth’s beautiful beach and this area has become a constant source of inspiration to me. You don’t have to wait long before a photo opportunity arises. Here are some of my favourite photos taken around the Weymouth beach area.
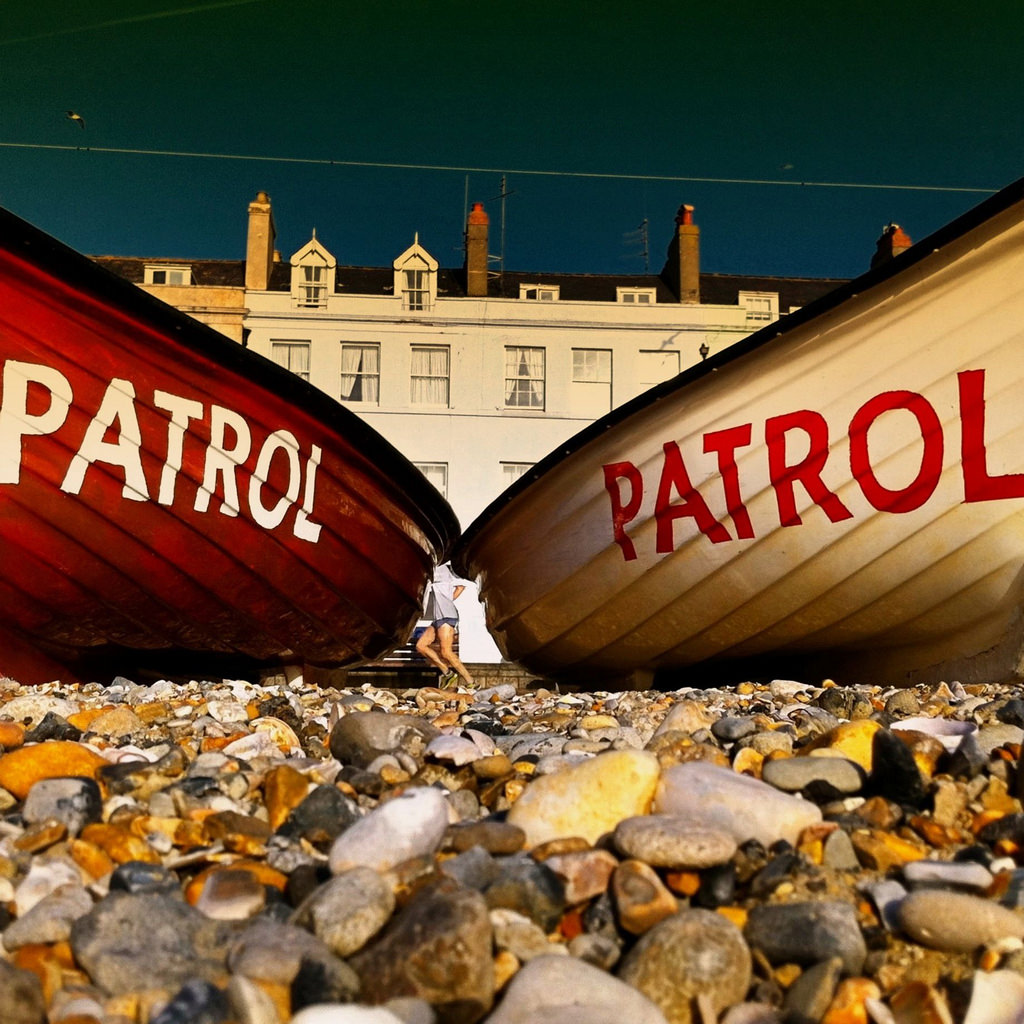
Attracted to the large lettering and symmetry of the boats, I lay down flat with my iPhone resting on the pebbles to keep my the shot steady. The important thing here is that I used ProCamera’s independent “focus” reticle and locked it onto the far distance. You’ll see that this gave soft focus to the foregraound drawing the viewer’s eye to the sharper subject, the jogger, in the background.
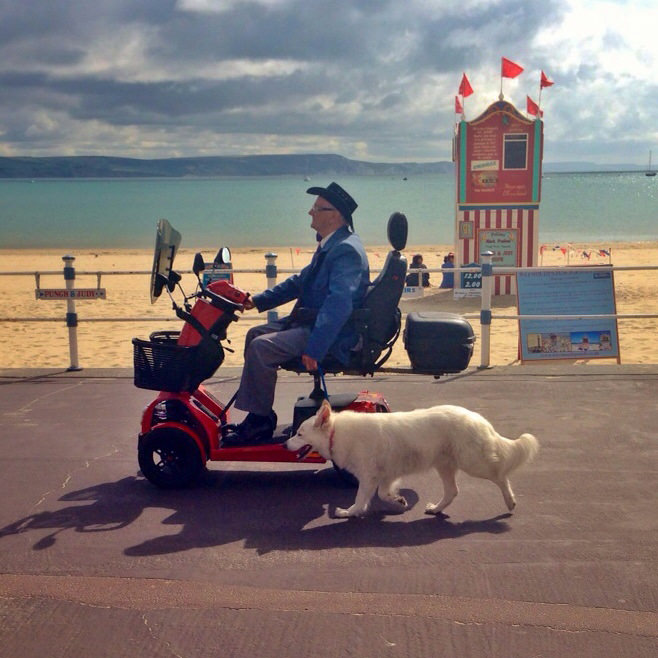
The Punch and Judy hut against the beachscape in the background set the scene for this shot. I just had to wait for the characters to enter the stage – my lucky day!
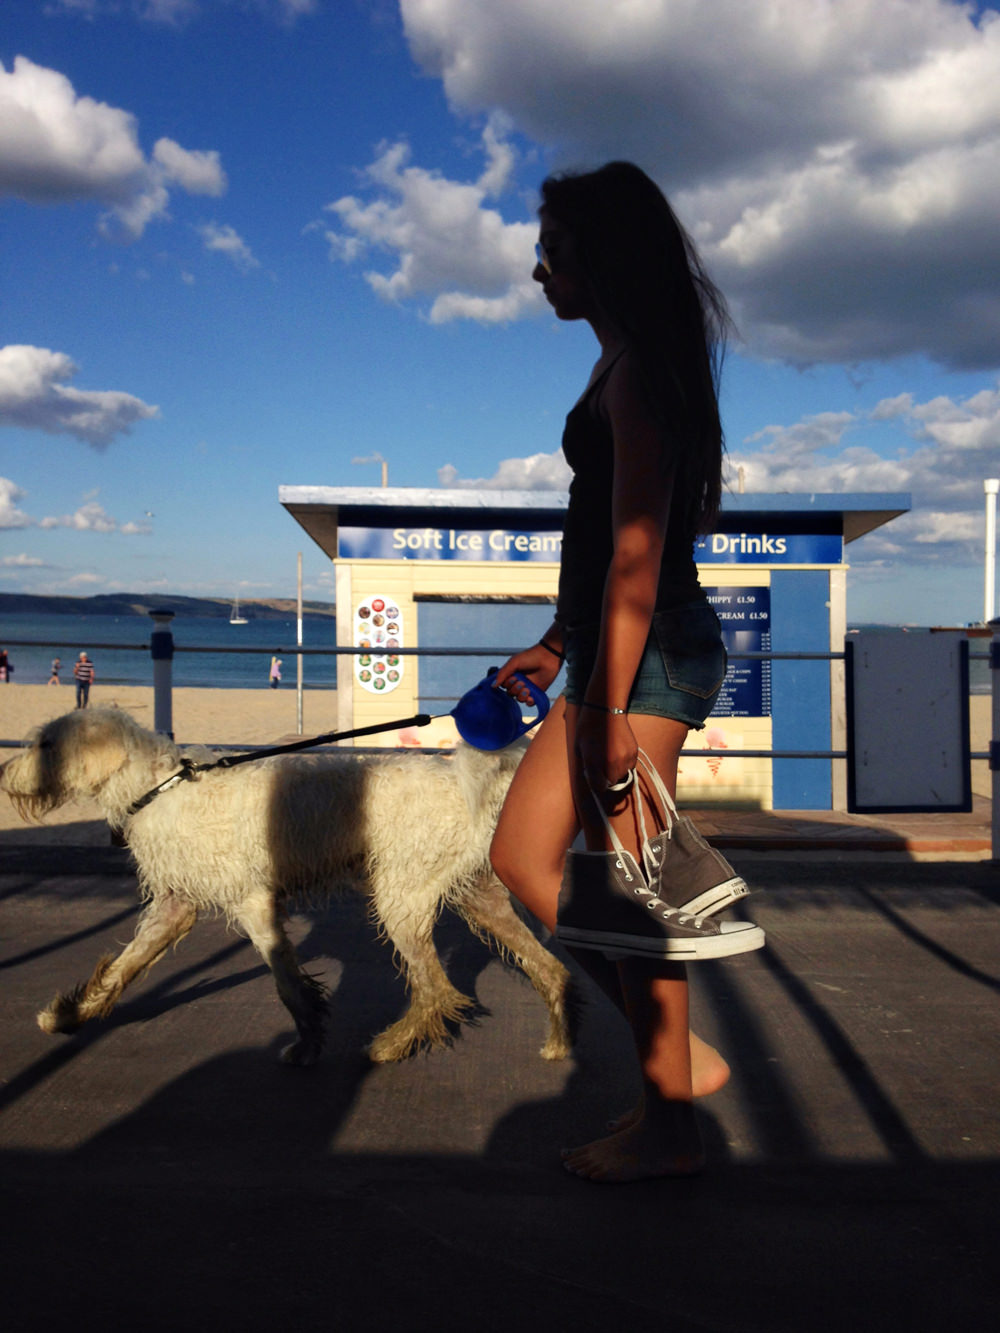
With the image above, I locked my focus and exposure on the area where this woman and her dog walked by. If I hadn’t have locked the exposure, when she walked by, my iPhone would have tried to compensate for the lack of light and this picture would have been much lighter and overexposed in the background altogether losing the mood and atmosphere of the image
As well as using the focus feature in ProCamera, I love to play with the more advanced controls including the exposure and white balance. In the image above I used the manual exposure dial to overexpose the image, later increasing the saturation using ProCamera’s excellent Filters to make the bright colours pop!
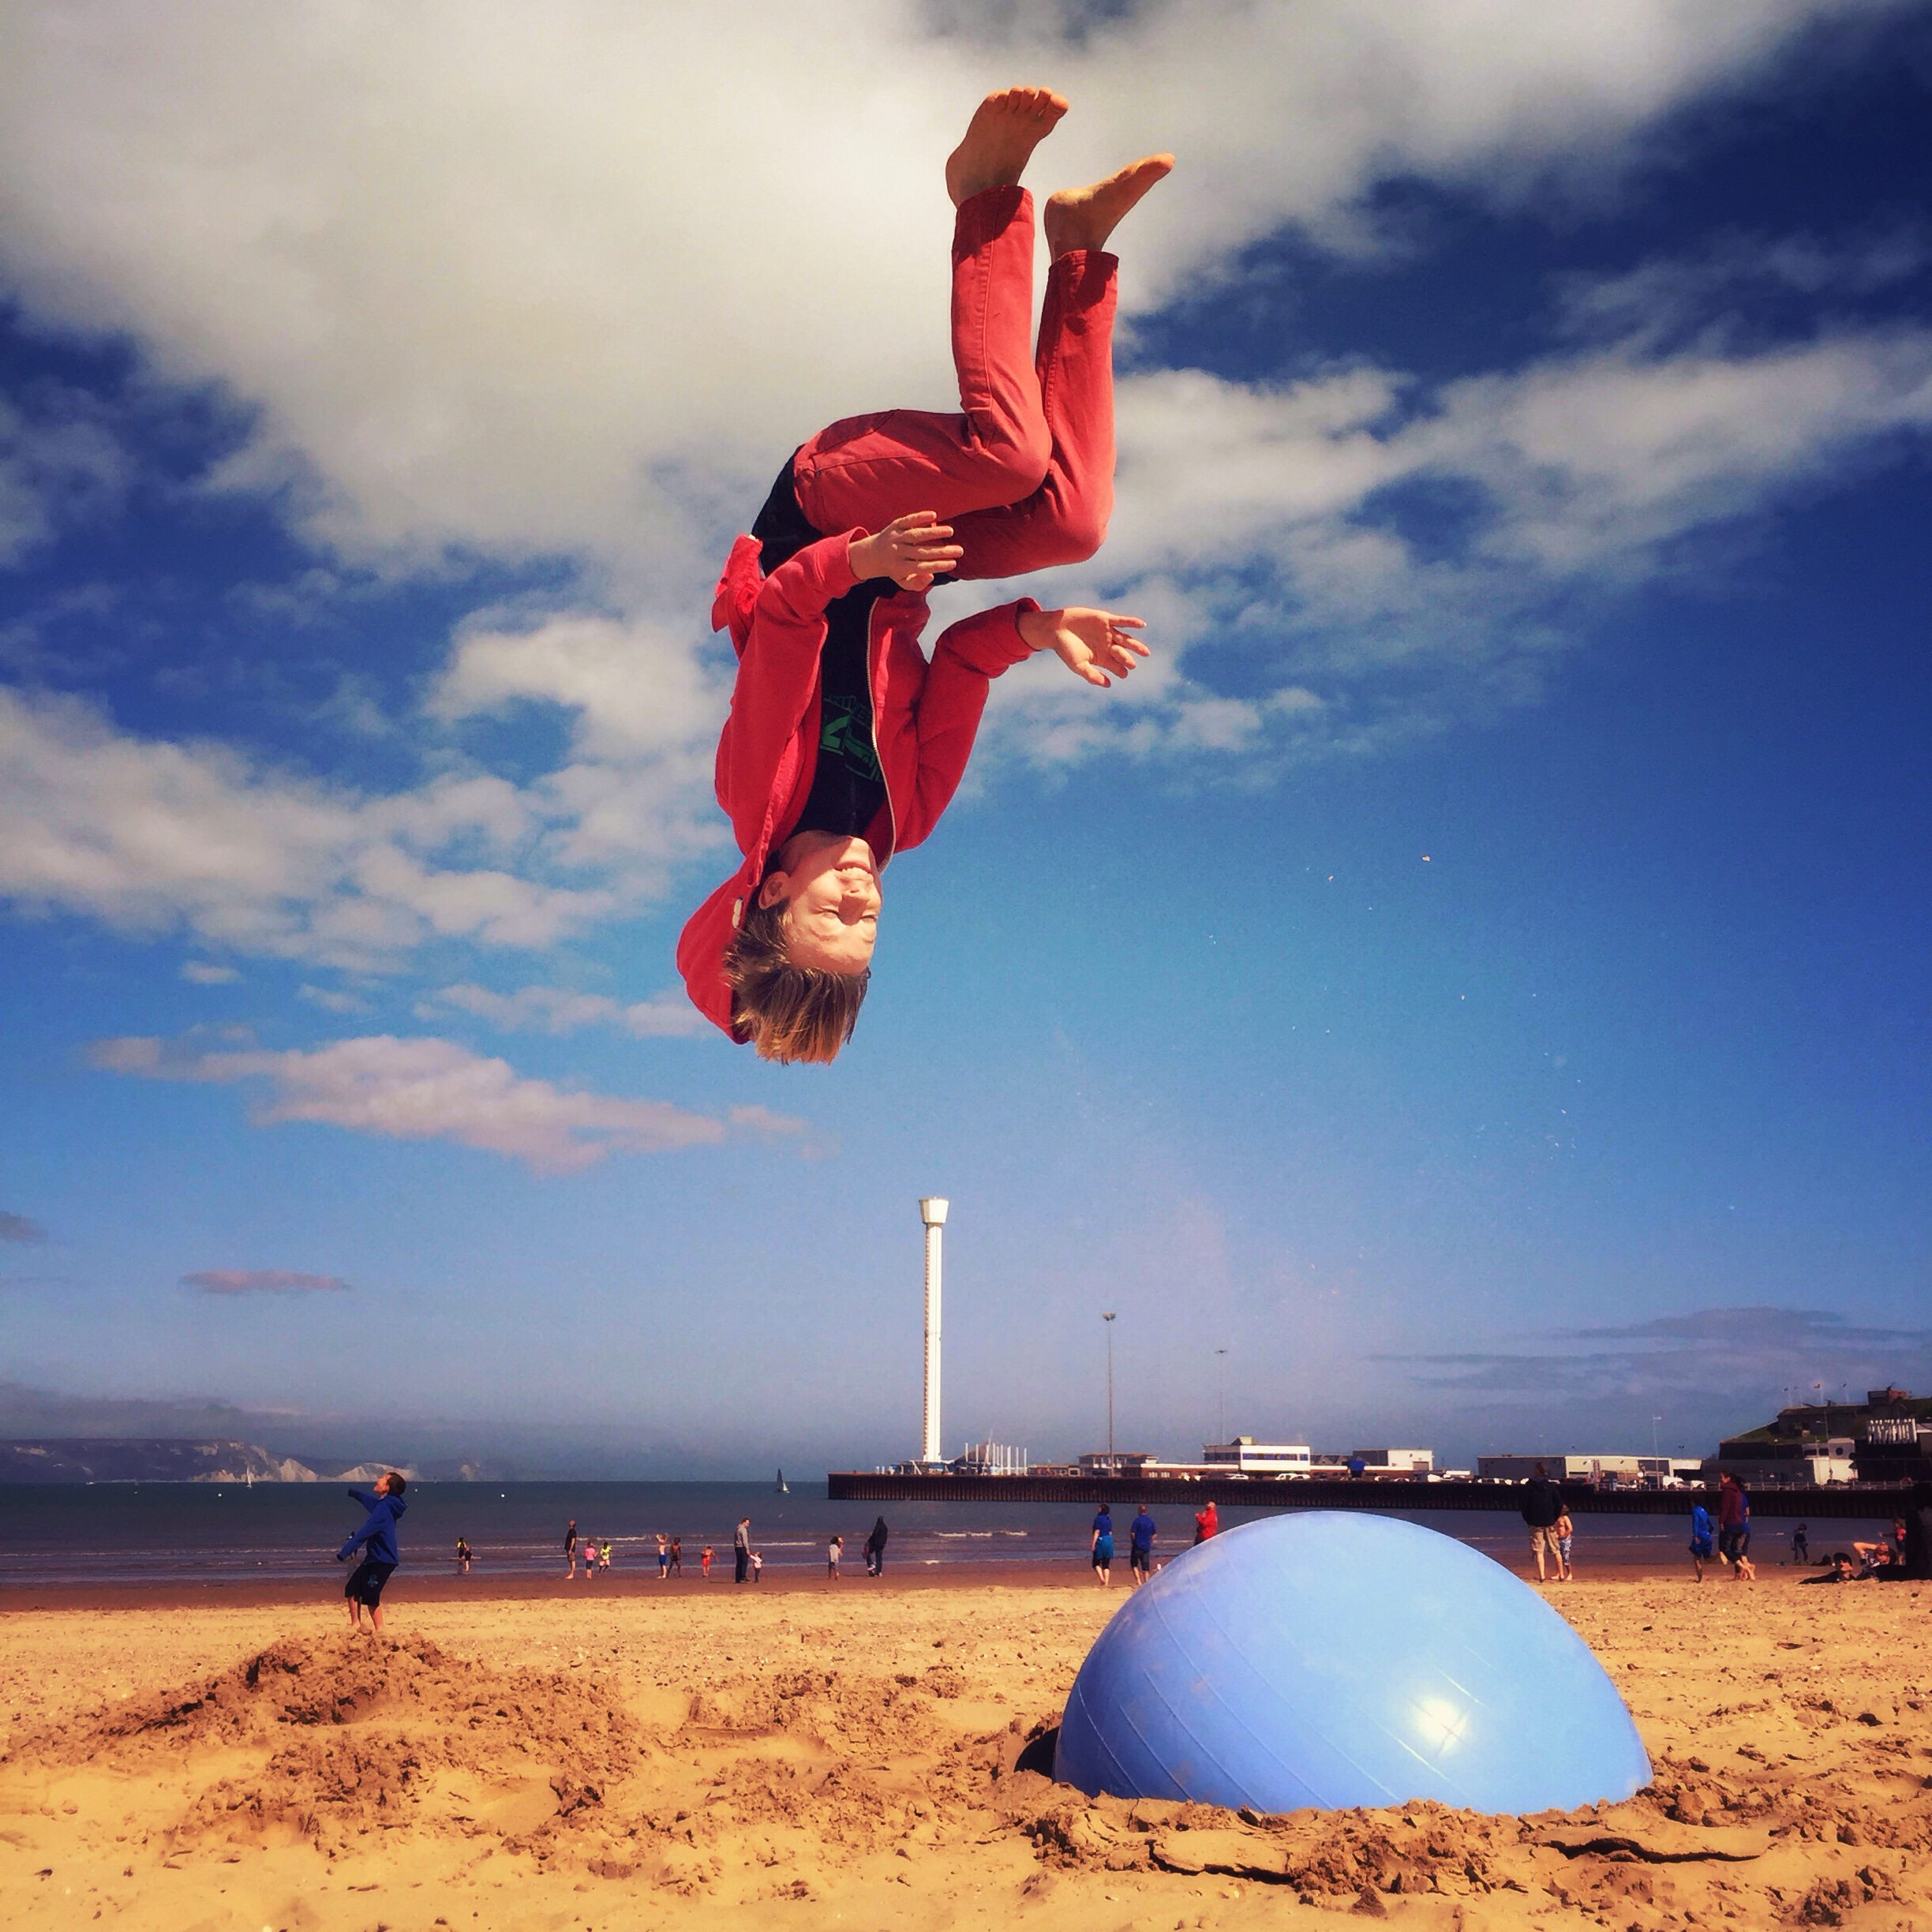
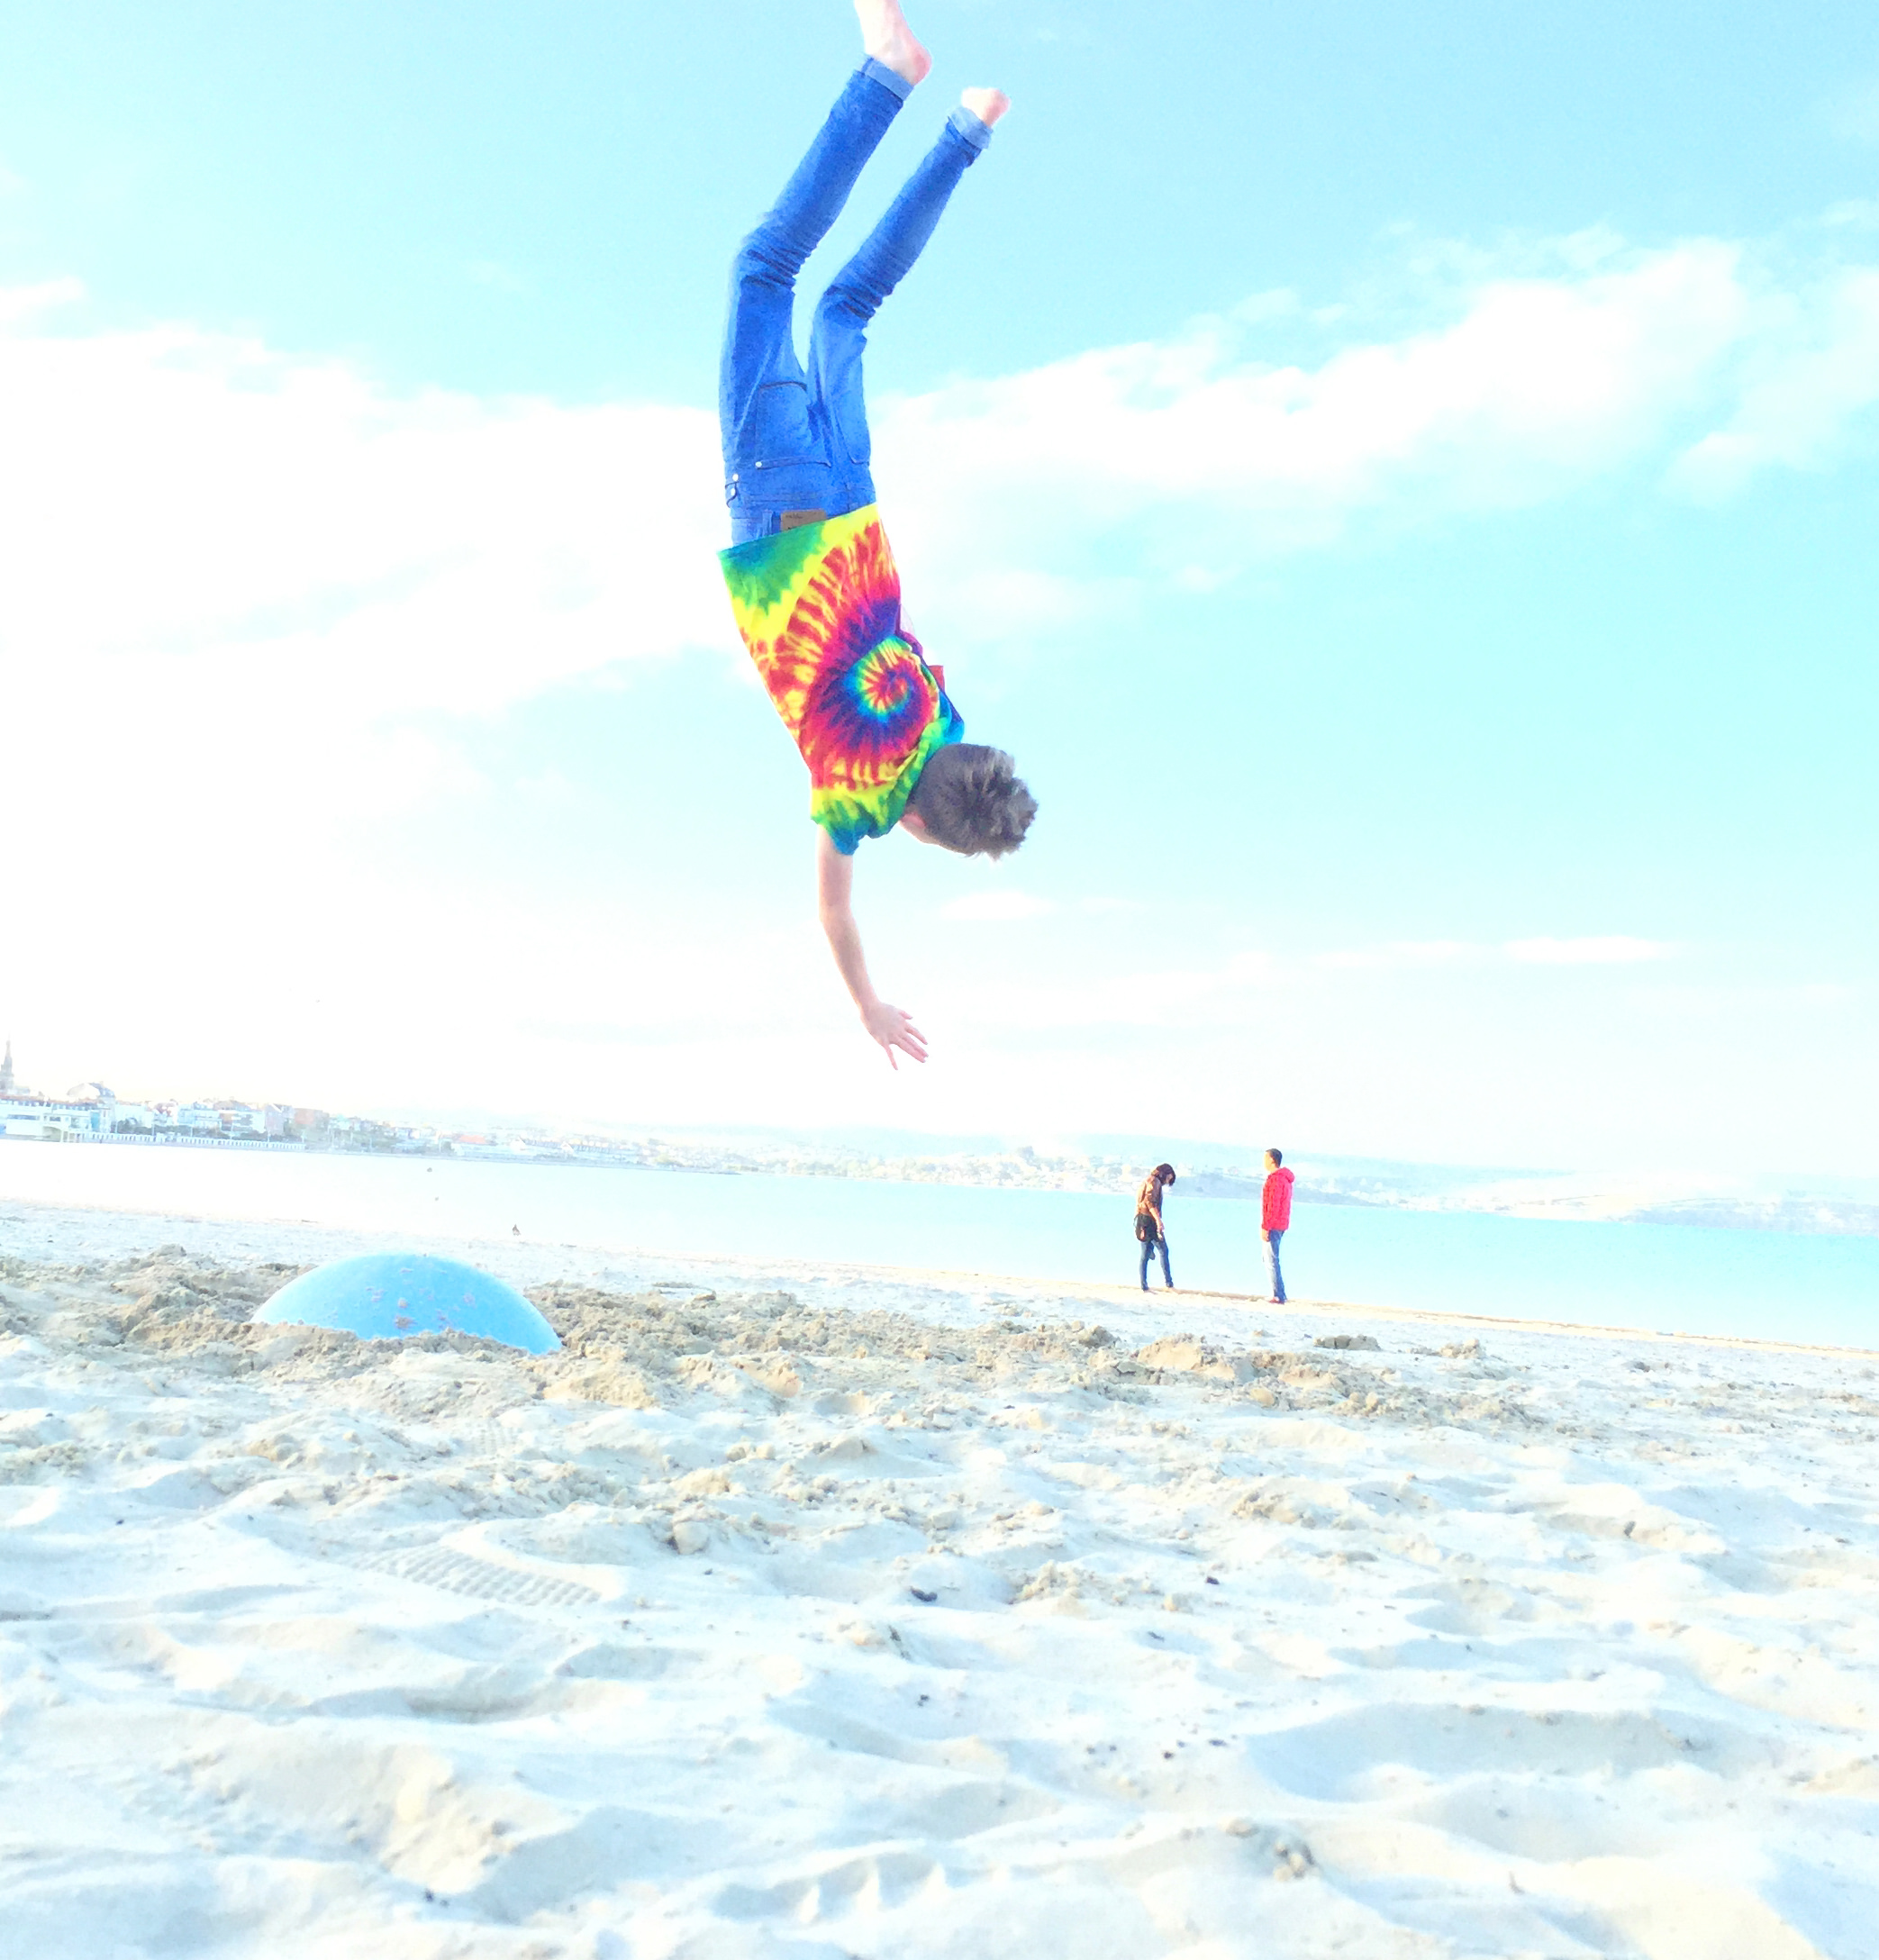
My teenage son, Lewis, is very energetic and loves to do somersaults on the beach using a half-buried gym/fitness ball to give him some extra bounce. In action photography, it’s hard to focus on the subject if it is moving very quickly – so lock your focus on the area where you anticipate the action will happen, in this case on the beach ball. Alternatively you could ask your subject to stand in the area where the action will take place and set your focus at that point.
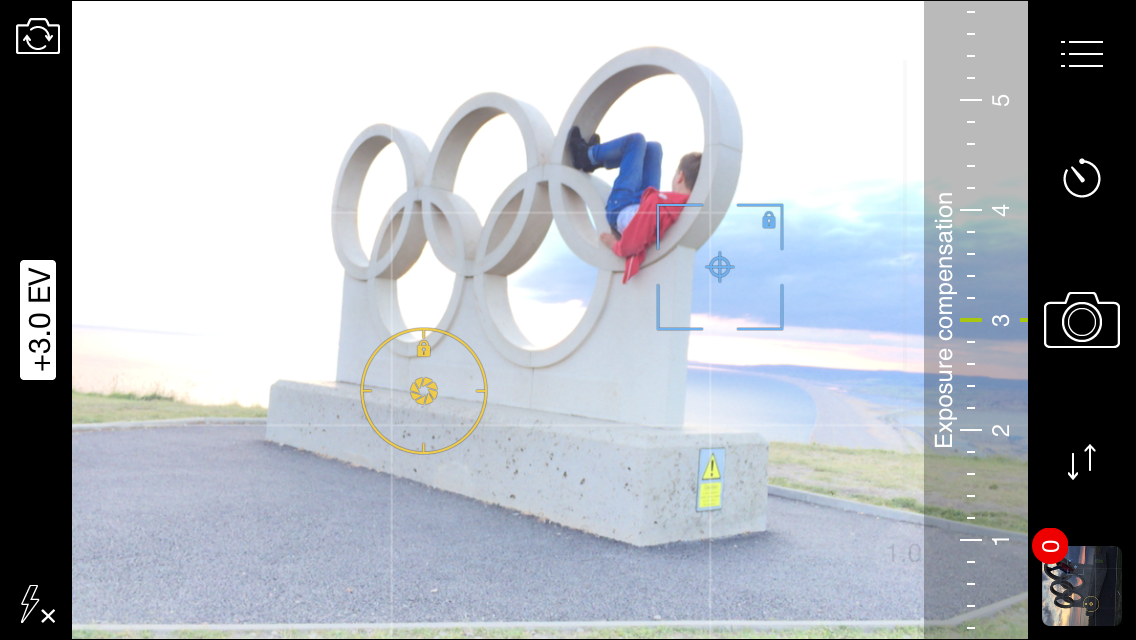
In 2012 Weymouth & Portland hosted the 2012 Olympics. This sculpture is carved from the famous Portland stone and is located at a great vantage point overlooking the incredible Chesil beach stretching from Portland to Weymouth.
I happened to be in the area on the Isle of Portland when the sun was setting. You can see the different effects of setting both under and over-exposing your photos in ProCamera. Also, I used the advanced WhiteBalance feature to change the colour temperature and add warmth to the image as I shot it.

I placed the exposure reticle on a brighter part of the image to avoid overexposing parts of the photo.
Advanced exposure controls on ProCamera give you a lot of creative control over your image. This image is the result of increasing the exposure using the really easy-to-use dial to the right of the screen (or bottom of screen when shooting in portrait mode).
Tip: Manual focus gives you full creative control over your pictures, allowing you to produce more professional results. If you would like to pursue your passion, consider exploring remote job opportunities in photography to find flexible roles that let you practice and enhance your skills.