While Instagram is great for sharing your photos the in-built camera is limited in terms of shooting options.
Here at ProCamera we’ve worked hard to make our latest release (v4.0) perfect for Instagram photographers wanting more control over their shooting process. In this step by step I’ll show you how you can use ProCamera’s advanced features to take and then quickly send high quality photos to Instagram.
Shooting in Square Format
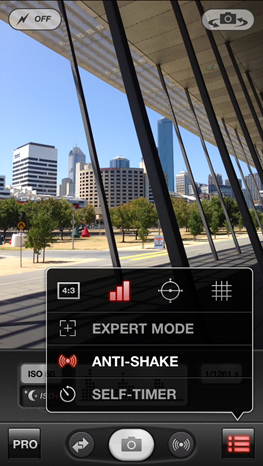
First, the new ProCamera 4.0 gives you control over your Capture Format. To change the Capture Format first click on the Options Menu (bottom-right) then press on the Capture Format button (top-left). You can see the Square Format (1:1) selected on the bottom-left screencap below. We included 1:1 native shooting because we’d heard from many photographers that they prefer to compose their shots directly within a square rather than cropping it after the fact.
 |
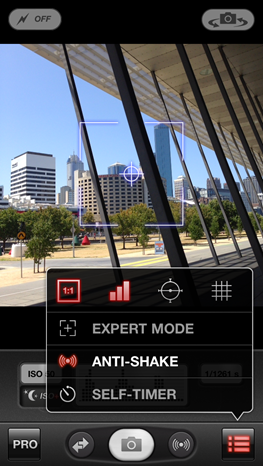 |
The other three formats are widescreen (16:9) standard (4:3) and 35mm (3:2).
Advanced Exposure and Focus Control
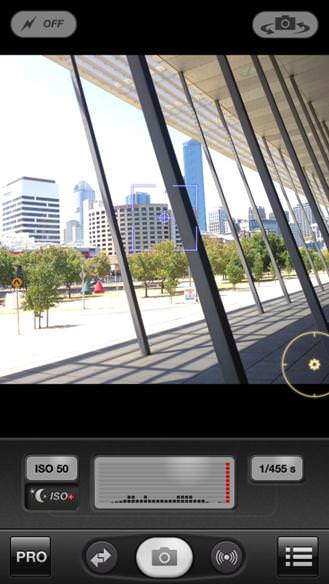
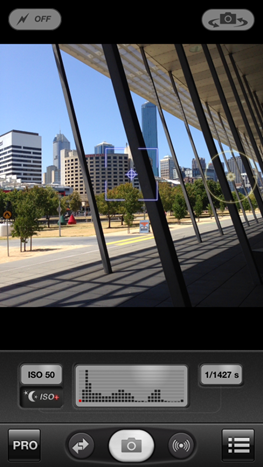
All the ProCamera controls work within the Square format. For example you can now use two fingers to split your focus and exposure points. You can drag the yellow exposure circle until you find the most balanced exposure for your shot. Similarly, the blue focus square can be controlled independely to select your focal point.
The below-right screencap shows the exposure circle on the shadow area of the image – resulting in parts of the photo being overexposed (blown highlights). Moving the exposure circle to the bright area results in a more balanced exposure (bottom-right screencap).
 |
 |
Note: You can also use the ProCamera Histogram to check your exposure. The histogram provides red warning bars for under and overexposure – as shown in the above-left screencap. More information on the ProCamera histrogram can be found in this article.
Digital Zoom
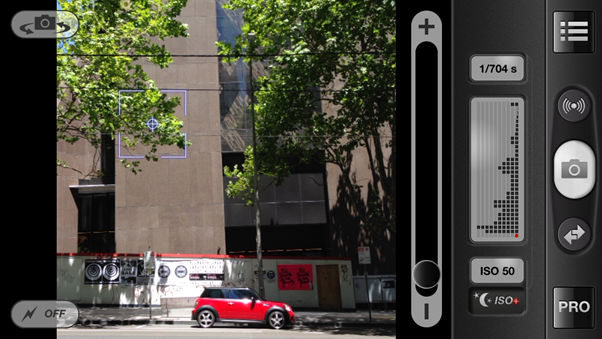
ProCamera 4.0 also gives you an optimised digital zoom (you can’t zoom at all in Instagram). The standard zoom function can be found at the left of the image and can be activated with an up/down swipe (landscape orientation). Otherwise you can activate the pinch to zoom in the Settings Menu. To do this click on PRO>SETTINGS>MORE>Pinch to Zoom> ON.
You can see the zoom bar in the below screencap.
Anti-Shake
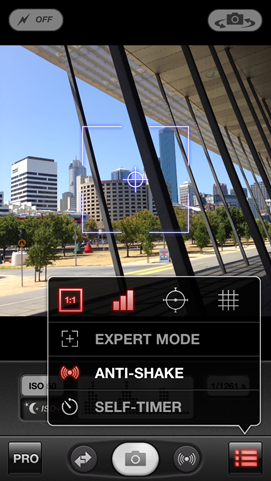
The further you zoom the more camera-shake is introduced. One way to reduce this is to use the Anti-Shake function which can be activated by pressing on the Options Menu>Anti-Shake. The secondary shutter (directly left of the main shutter button) can be either set as an Anti-shake or Self-Timer (as shown in the screencap below). The Anti-shake function is also great in low-light situations when the camera is using a low shutter speed. Just make sure you hold the iPhone as still as you can to activate the shutter.
QuickFlick to access the Lightbox
Once you have taken your photos you can quickly access either the ProCamera Lightbox (if turned on) or Camera Roll with the QuickFlick Album feature. All you have to do is swipe left to right from the Capture Screen to access the saved photographs (you can see how QuickFlick works in the video at the end of this guide).
Sending your photo with ProCamera’s SquarePrepare
We’ve created an integrated SquarePrepare tool to quickly and easily get your photos into Instagram. SquarePrepare works for all different image sizes and lets you scale and reposition your photos on a white canvas before you send them to Instagram.
 |
 |
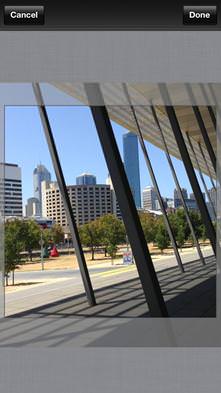 |
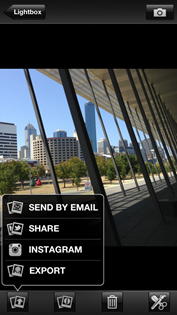
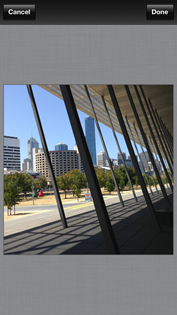
| To start, press on the Share button (bottom-left) and select Instagram | This brings up the SquarePrepare tool | From here you can pinch to zoom and reposition your photo. |
 |
 |
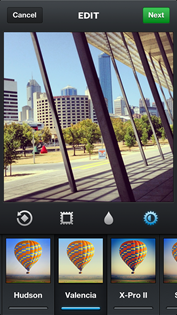 |
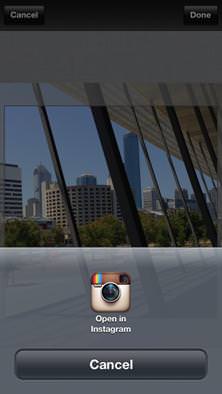
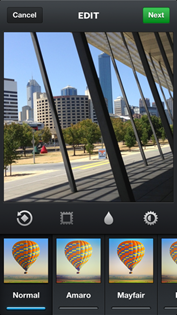
| Press Done (top-right) to commit the changes and then click on the Open in Instagram icon that pops up. | This loads your photograph straight into the Instagram Edit screen. | From here you can still apply all the Instagram filters and tilt-shift effects. |
Note: You can also import landscape and portrait photos and snap them to any of the canvas edges, check out this tutorial for more information on non-square image imports.
As you can see you can now use ProCamera to take professional square photographs that can be quickly and easily shared to Instagram with the SquarePrepare tool.
The video below shows the full sequence from Capture Screen, Lightbox, SquarePrepare and then Instagram. You can also find more shooting tips in our first official Basics Shooting Tutorial here.
Are you using ProCamera to take your Instagram photos? We’d love to see your photos, just add your Instagram username in the comments below.
—
ProCamera 4.0 for iPhone is available for $2.99 from the Apple AppStore.


