The Tone Correction tool is one of the most exciting editions to the latest ProCamera 4.0 for iPhone.
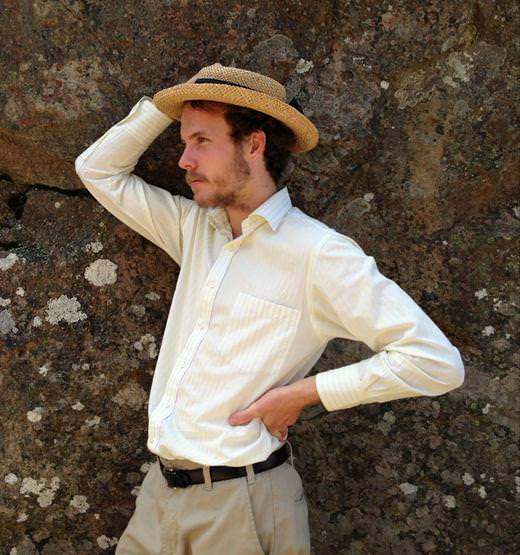
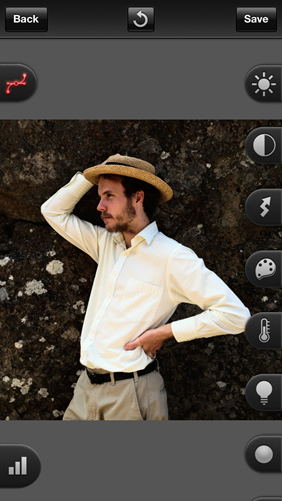
In this tutorial I’m going to show you how the tool works and what it can do. Here is the photo that I’ll be working on. I shot this picture yesterday on a day trip to Hanging Rock in Victoria, Australia. I’ve already pre-cropped the picture into square format using the ProCamera ProCut tool.
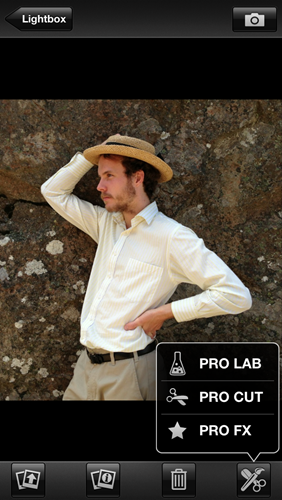
We’re starting this tutorial in the single image view within the ProCamera Albums and Studios. This can be accessed from the Capture Screen by either using the QuickFlick function (left to right swipe) or by pressing on PRO>Albums and Studios. You can see a video of the QuickFlick function in this tutorial.
 |
 |
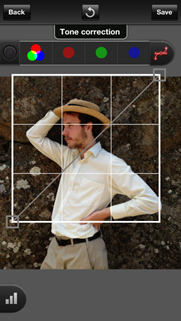
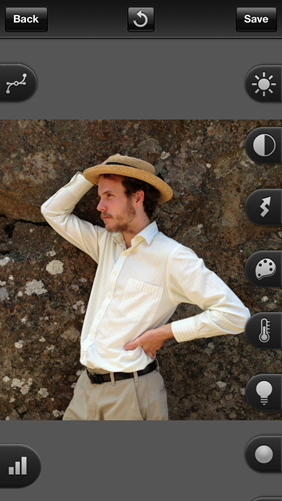
| Press on the Edit Button (Scissor and Brush Icon) in the bottom-right corner. This brings up three options – we’re using ProLab for this tutorial. | Here is the ProLab screen, the Tone Correction tool is located top-left and bottom-left respectively. The rest of the image adjustment sliders are located on the right. Click on the Tone Correction button to slide it out. |
 |
 |
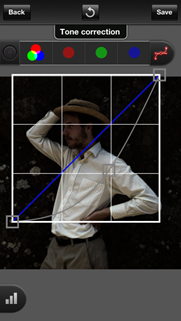 |
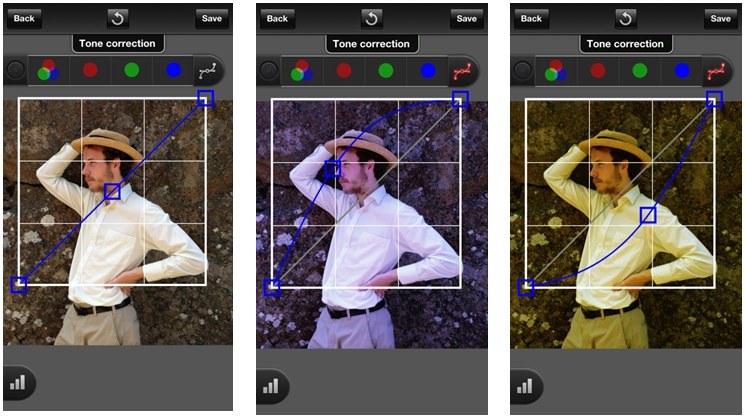
| This is the Tone Correction tool. You can place editing points on the diagonal line, dragging the line into a curve changes the light levels in the photo. | As a guide, pulling the curve upwards makes the image brighter. | Pushing the curve downwards makes the image darker. |
Note* A full technical explanation of the curves tool can be found in this article.
The S-Curve
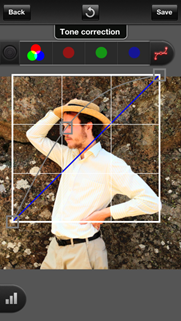
For the first edit I’m going to use a standard S-Curve, this is one of the most effective and popular image edits used by professional photographers. In simple terms, an S-Curve makes an image ‘pop’ by making bright areas brighter and dark areas darker.
 |
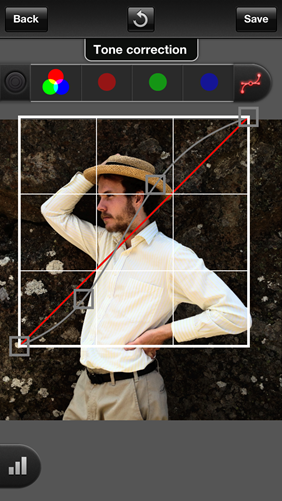 |
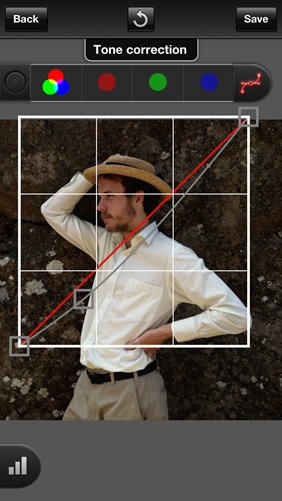
| Here I’ve added an adjustment point to the bottom half of the diagonal line pulling it down slightly. This darkens the stone wall and draws attention to the figure. | I’ve another adjustment point to the top part of the curve, this time I’ve pulled the curve upwards, brightening the light areas of the image. I’ve been careful to move the curve just enough so I don’t blow out the highlights in the white shirt.Now you can see why the adjustment is called an S-Curve. |
|
Before |
After |
 |
 |
| The S-Curve has added more contrast to the initial photograph, drawing the eye to the figure against the textured rock face. | |
Black and White Editing with Tone Correction
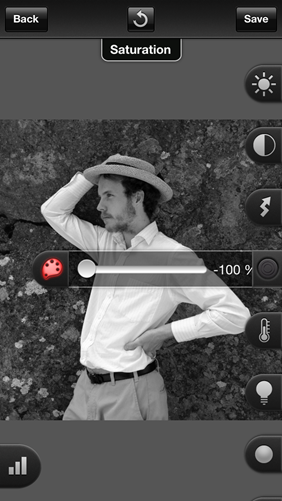
You can also use the Tone Correction Tool for black and white edits.
 |
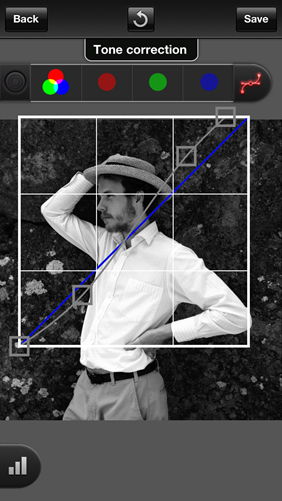 |
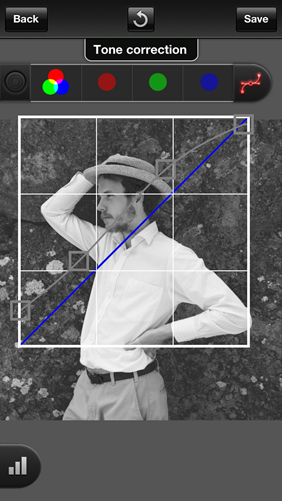
| Using the original colour image, first press the Saturation Slider (fourth down on the right-hand side). Now move the slider all the way left (-100%) to make the photo monochrome.Now you can close the Saturation Slider by pressing on the far-left easel symbol (highlighted above). | Open the Tone Correction Tool and experiment with different curves to change the light levels for the black and white image.Here I’ve also applied a similar S-Curve to add contrast. |
|
|
|
| And here is another curve which replicates the currently fashionable low-contrast washed out filters found in apps like VSCO CAM. You can see that for this curve I’ve moved the bottom-left point (the black point) upwards. This shifts the blacks to dark grey, grey, light grey and then white as you move up the line. Here I’ve moved the black point about 1/8 of a way up the line, changing the black areas of the photo to a dark-grey. | |
 |
 |
|
Which version do you like more? |
|
Duo-tone editing
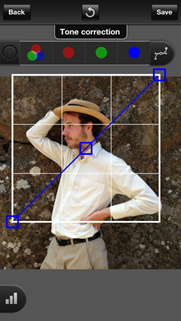
Here’s one more example. Using the original colour photo, this time were going to switch into the single colour channel mode available in the top bar.
 |
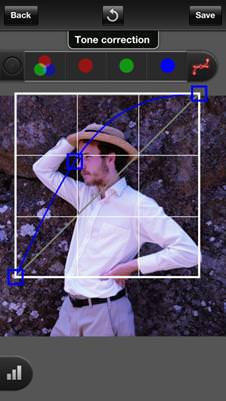 |
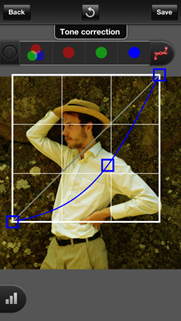 |
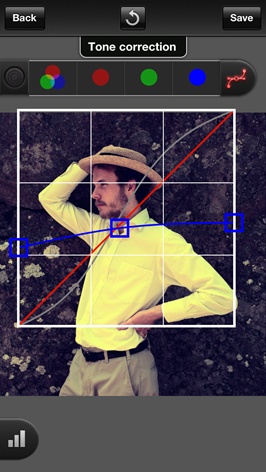
| I’ve selected the blue channel (The colour of the line indicates the channel selected). | Pulling the curve up tones the image blue | Pushing the curve down tones it yellow |
|
|
| Now for the tricky bit. Here I’ve moved the black point (bottom-left) up the line, making the black parts of the image dark blue. I’ve also moved the white point (top-right) down the right side, making the white parts yellow. A simple duotone image! |
As you can see the Tone Correction Tool can be used for multi-colour, black and white and duotone image correction.
Do you have any tips and tricks when you edit with curves?
—
ProCamera 4.0.1 is available from the AppStore for $2.99. The latest update fixes a few small bugs.


Awesome tips! Thanks for sharing.
Great, thanks for the lesson. This really helps. I’m liking this app more and more!
Thanks @twitter-1007512112:disqus and @superboy77:disqus – glad you found the tutorial useful.
This is fascinating apps.
This is very nice information about photo App. we also have business related to photo editing. Thanks for sharing this useful information –
Extraordinary, a debt of gratitude is in order for the lesson. This truly makes a difference. I’m loving this application to an ever increasing extent!